
The Secret to Smooth Campfire Cold Brew
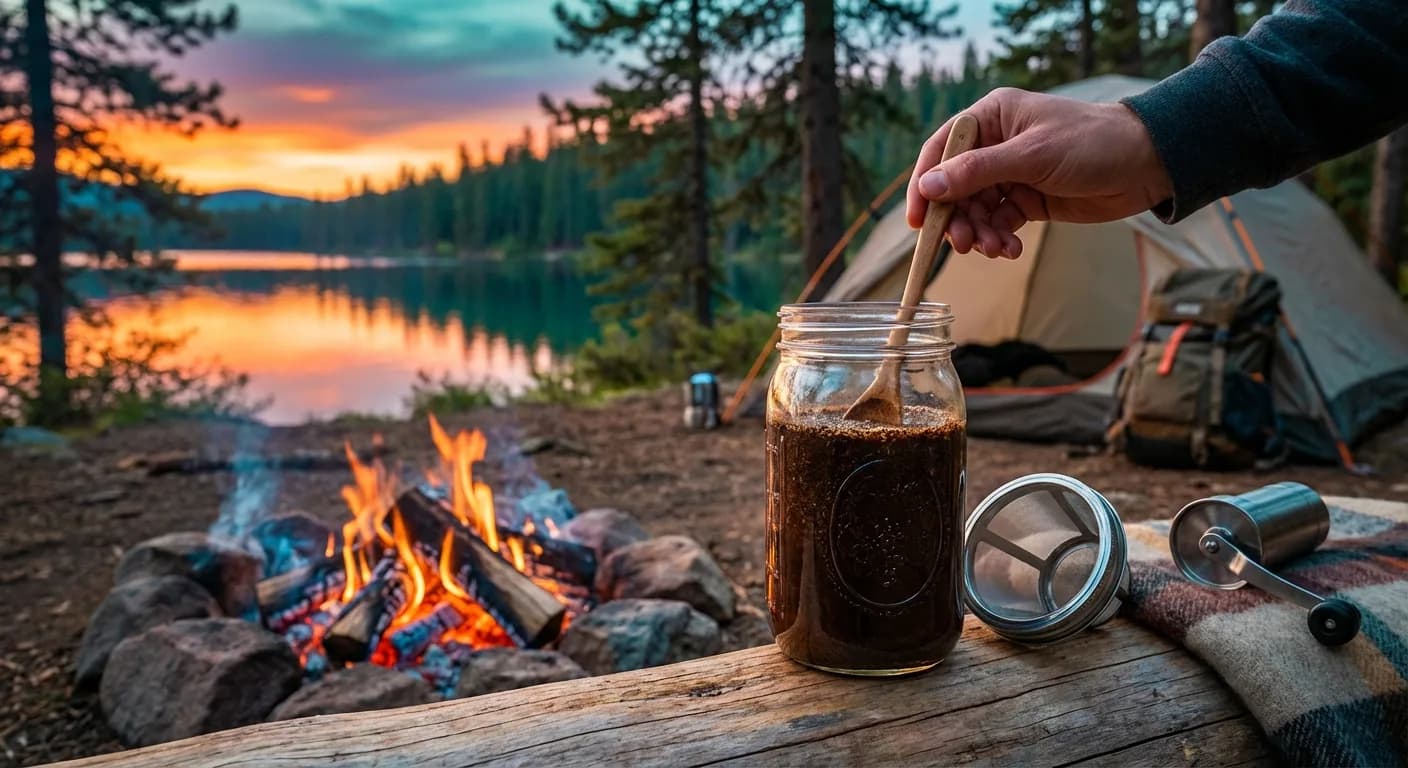
Table of Contents
- Introduction
- Why Cold Brew is the Ultimate Camping Hack
- The Essential Gear for Off-Grid Brewing
- The Golden Ratio: Measuring Without a Scale
- The Creek-Side Cold Brew Method: A Step-by-Step Guide
- Managing Temperature and Extraction in the Wild
- Pro-Tips for a Cleaner, Smoother Cup
- Frequently Asked Questions
Introduction
There is a specific kind of magic that happens when you wake up in the backcountry, unzip your tent, and realize you don’t have to wait for a stove to boil or a fire to crackle before your first sip of caffeine. While we love the ritual of a pour-over or the hiss of a Moka pot, the "camping cold brew guide" isn't just about a different flavor profile; it’s about tactical efficiency. Cold brew allows you to prep your caffeine fix the night before, letting the slow passage of time do the heavy lifting while you sleep under the stars.
The problem many nomads face is the "silt factor." Traditional cold brew methods often rely on heavy glass carafes and fine paper filters that aren't exactly trail-friendly. When you're miles from the nearest kitchen, you need a method that is rugged, low-maintenance, and capable of producing a concentrate so smooth it masks even the slightest hint of "trail water." This guide will walk you through the nuances of campfire cold brewing, ensuring you get a professional-grade result without needing a barista's setup.
In the following sections, we will dive deep into the science of cold extraction in varying temperatures, the best gear for off-grid durability, and the "secret" ratio that works every time, regardless of whether you're at sea level or 10,000 feet. You’ll learn how to leverage your natural surroundings to maintain the perfect brewing temperature and how to clean up without leaving a trace in the wilderness.

Why Cold Brew is the Ultimate Camping Hack
When you are living off-grid, energy conservation is the name of the game—and that applies to your fuel canisters as much as your own physical stamina. Traditional hot brewing methods require you to burn through your limited supply of propane or butane just to get a cup of coffee. Cold brew, by definition, requires zero heat. By shifting your "brewing" time to the overnight hours, you save your fuel for cooking actual meals, making your entire camp setup more efficient and sustainable for longer trips.
Beyond the fuel savings, cold brew is significantly more forgiving than hot coffee. When you use hot water, the high temperature extracts oils and acids quickly; if your water is too hot or your grind is off, you end up with a bitter, astringent mess. Cold water extraction is a much slower, gentler process. It leaves behind the harsh acids and highlights the chocolatey, nutty notes of the bean. This is particularly helpful when you're using water that might have a slight mineral tang from a portable filter—the smoothness of cold brew helps mask those imperfections.
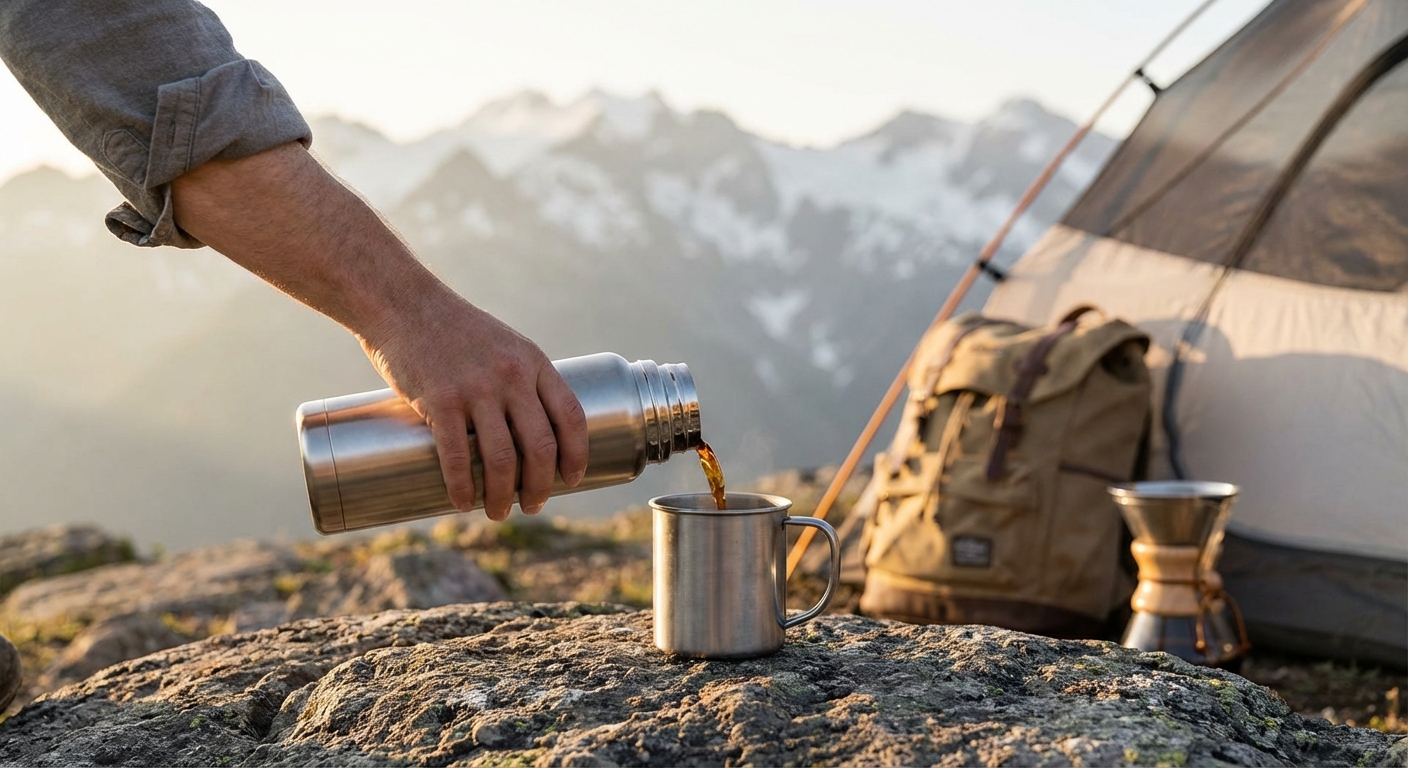
Lastly, cold brew serves as a versatile concentrate. If you brew it strong, you can drink it over ice on a hot afternoon hike, or you can actually add a splash of boiling water to it in the morning for a "quick" hot coffee that is lower in acid than a standard drip. This versatility makes it the Swiss Army knife of coffee methods. For the nomad who is constantly moving, having a liter of cold brew concentrate stashed in the cooler means you have an instant energy boost ready at a moment's notice, with no cleanup required during the morning rush to break camp.
The Essential Gear for Off-Grid Brewing
To master the camping cold brew, you need gear that prioritizes durability over aesthetics. Glass is the enemy of the nomad; one dropped Mason jar can ruin a trip and create a safety hazard in the wilderness. Instead, look for stainless steel or BPA-free, heavy-duty plastics. A wide-mouth container is essential, as it makes it significantly easier to dump out wet coffee grounds—a task that can be surprisingly frustrating with narrow-necked bottles.
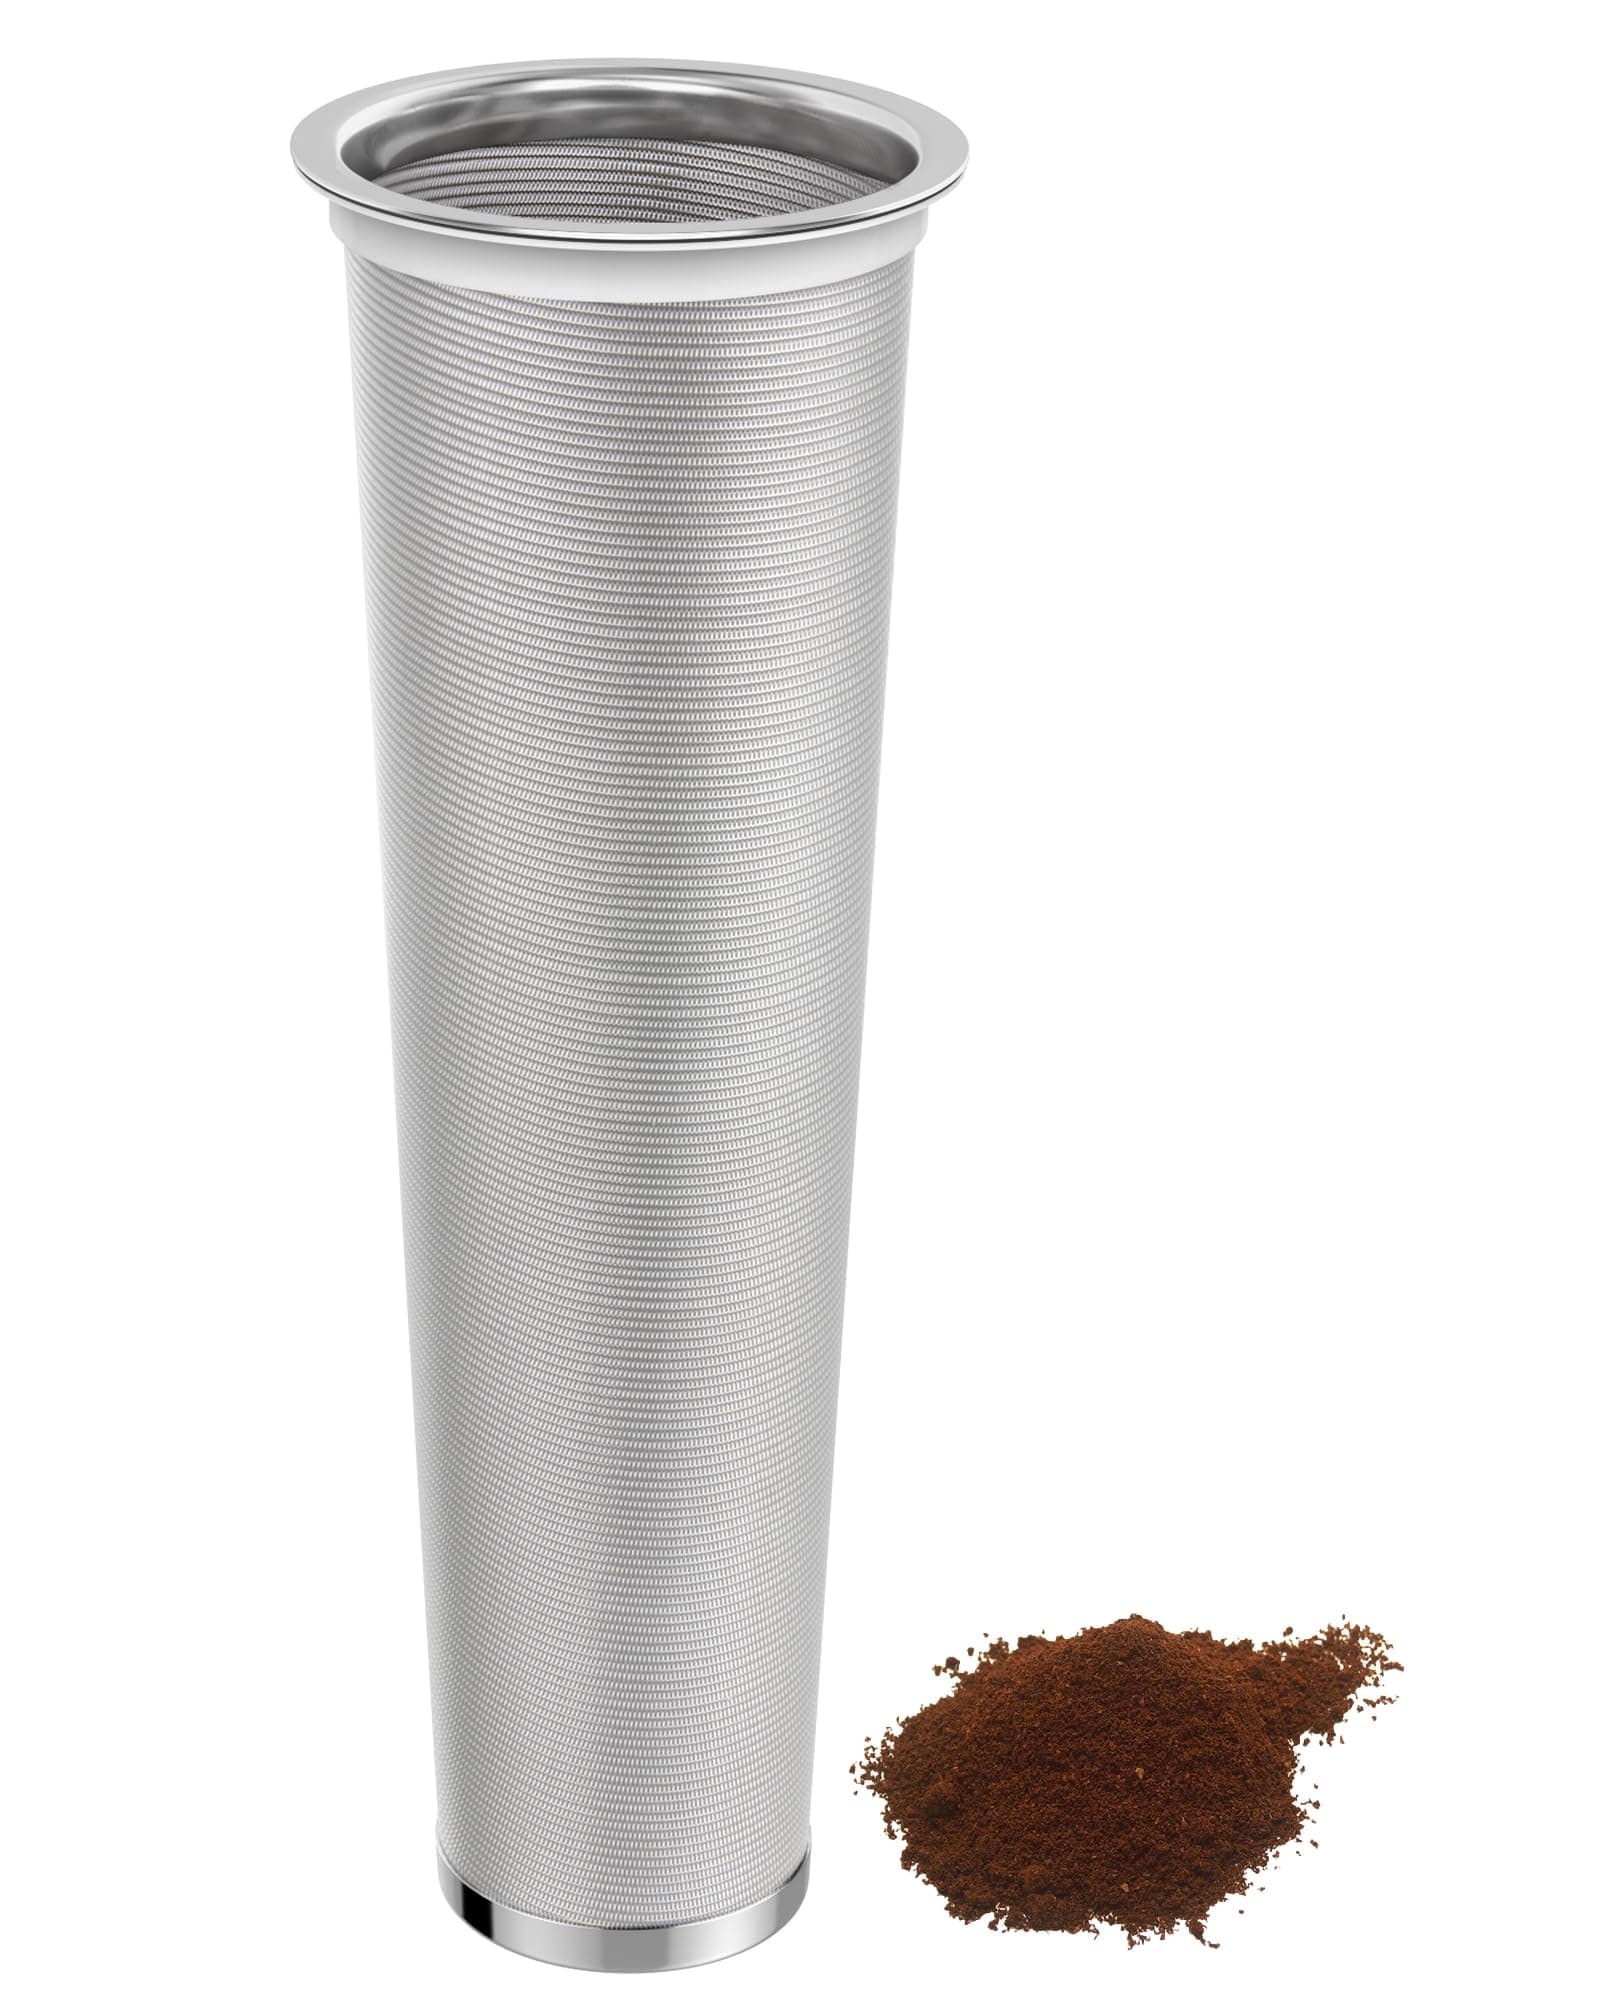
For the actual filtration, you have two main paths: the "immersion and strain" method or the "dedicated filter" method. The immersion method involves letting the grounds float free in a bottle and then pouring them through a bandana or a portable mesh filter. While rustic, this often leads to more sediment. The dedicated filter method uses a stainless steel mesh insert that sits inside your bottle. This keeps the grounds contained, making cleanup a breeze and ensuring that your last sip is as smooth as your first.
{{PRODUCT_CARD:B07L6M9S8D}}
I highly recommend the Stanley French Press for camping cold brew because of its legendary "Hammertone" durability and vacuum insulation. While designed for hot coffee, its fine mesh plunger is perfect for cold brew. You simply add your grounds and cold water, let it sit overnight with the plunger up, and press it in the morning. It’s best for car campers or overlanders who want a multi-use tool that can handle both hot and cold brewing without breaking.
The standout feature here is the 48oz capacity, which allows you to brew enough concentrate for a small group or several days of solo travel. The vacuum-insulated walls also mean that if you brew your coffee in the sun, the internal temperature stays stable, which is crucial for consistent extraction. One drawback is the weight; at over 2 pounds, it’s not something you’d want to carry in a 20-mile backpacking loop. However, for a basecamp setup, it is virtually indestructible and far superior to any glass alternative.
{{/PRODUCT_CARD}}
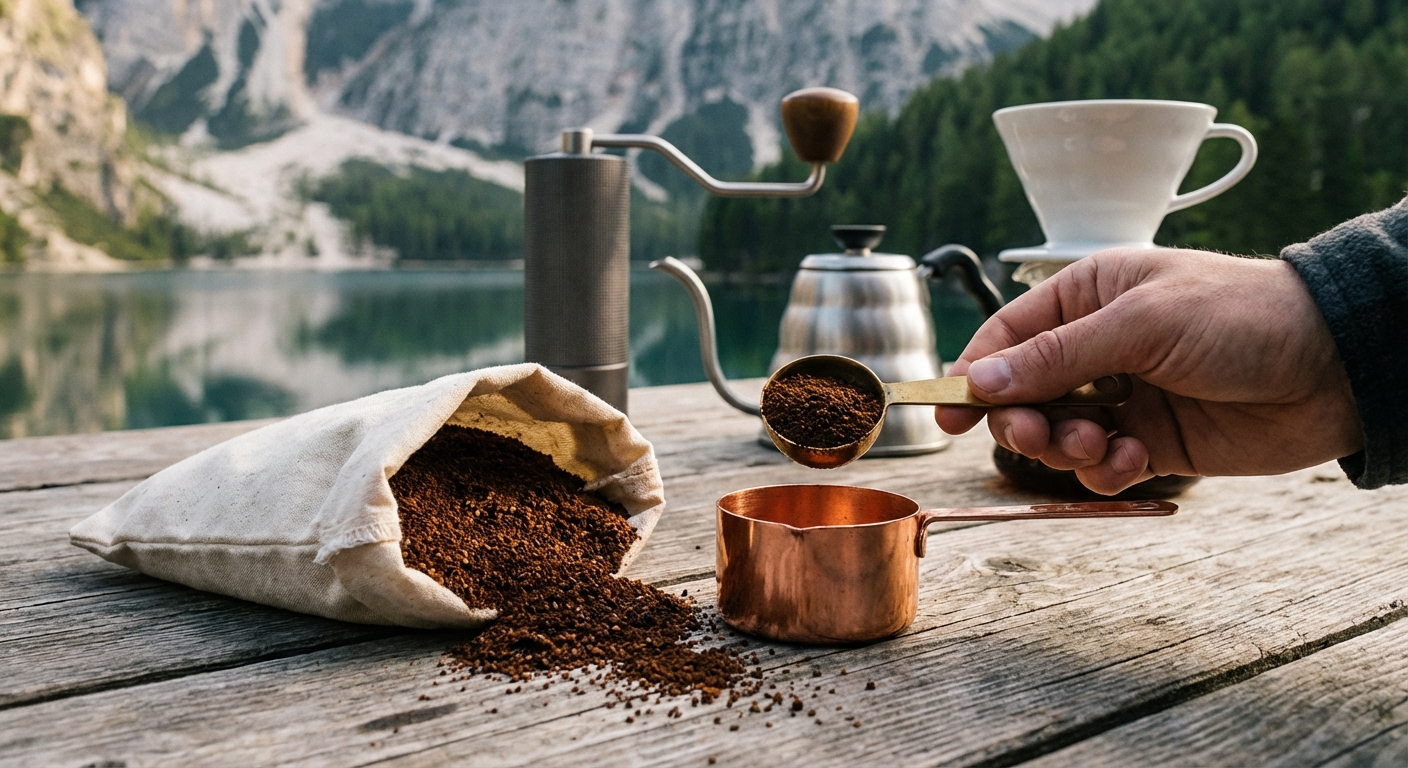
The Golden Ratio: Measuring Without a Scale
Precision is difficult when you're living out of a van or a backpack. Carrying a digital scale is often impractical, so you need to master the art of volumetric ratios. For a solid cold brew concentrate that can be diluted with water or milk, the "Nomad Standard" is a 1:4 ratio. This translates roughly to one cup of coarsely ground coffee for every four cups of water. This creates a punchy, bold brew that holds up even when the ice starts to melt in your mug.
If you prefer to drink your coffee "black" and straight from the vessel without dilution, you should aim for a 1:8 ratio. This would be half a cup of grounds for every four cups of water. When measuring in the wild, use your camping mug as your measuring tool. Most standard camping mugs are about 12 to 16 ounces. If you fill your mug about 1/4 of the way with grounds and then fill the rest of your brewing vessel with four full mugs of water, you’ll be right in the ballpark for a perfect concentrate.
The grind size is the most critical variable in this equation. You want your coffee to look like coarse sea salt or cracked peppercorns. If the grind is too fine (like espresso or standard drip), the water will over-extract the beans, leading to a bitter, "muddy" flavor. Because cold brew sits for 12 to 24 hours, the large surface area of a coarse grind allows for a slow, steady release of flavor. If you're grinding at home before your trip, always lean toward "too coarse" rather than "too fine."
The Creek-Side Cold Brew Method: A Step-by-Step Guide
The actual process of brewing in the wild is simple, but timing is everything. Start your brew about an hour before you plan to go to sleep. First, add your coarse grounds to your vessel. If you are using a filter insert, ensure it is seated properly. Slowly pour your cold, filtered water over the grounds, making sure to saturate all of them. A common mistake is leaving "dry pockets" of air in the grounds, which results in a weaker brew. Give the mixture a gentle stir with a spoon or a clean twig to ensure total immersion.
Once mixed, seal your container tightly. This is where the "creek-side" trick comes in. If the weather is warm, leaving your brew on a picnic table can lead to sour flavors. Instead, find a shallow, shaded area of a nearby creek or place the vessel in your cooler. The goal is to keep the temperature between 35°F and 50°F. If you're backpacking and have no cooler, find the deepest shade possible—perhaps under a thick bush or partially buried in cool earth.
After 12 to 18 hours (depending on the ambient temperature), it’s time to "pull the plug." If you used a filter bag or mesh insert, simply remove it and dispose of the grounds according to Leave No Trace principles (never dump them directly into a water source). If you did a loose immersion, pour the coffee through your strainer into a clean mug. The result should be a dark, syrupy liquid that smells like dark chocolate and toasted nuts.
Managing Temperature and Extraction in the Wild
Temperature management is the "secret" mentioned in the title of this article. In a kitchen, you have a controlled climate. In the woods, the temperature might drop 30 degrees overnight. This fluctuation affects how fast the coffee extracts. If you are camping in the desert where it stays warm at night, your coffee might be ready in as little as 10 hours. If you are in the mountains where it dips toward freezing, you might need a full 24 hours to get the same strength.
To combat this, use an insulated vessel. A vacuum-sealed stainless steel bottle acts as a thermal buffer, keeping the water at a consistent temperature regardless of the outside air. This consistency is what leads to a "smooth" profile. If the water gets too warm, you extract the bitter tannins; if it stays too cold, you might only get the top notes and miss out on the body of the coffee. If you don't have an insulated bottle, wrapping your brewing jar in a spare wool sock or a down jacket can provide enough insulation to keep the extraction process steady.
Another factor is water quality. While it’s tempting to use "fresh" mountain water, the mineral content can drastically change the extraction rate. High mineral content (hard water) can make cold brew taste "chalky." If you are using a portable filter like a Sawyer Squeeze or a Katadyn, you are removing the bacteria but not necessarily the minerals. For the absolute best results, if you're car camping, bring a gallon of spring water from home. If you're deep in the backcountry, just be aware that "wild" water may require a slightly longer steep time to overcome its natural alkalinity.
Pro-Tips for a Cleaner, Smoother Cup
One of the best-kept secrets for a sediment-free camping cold brew is the "double-filter" technique. Even with a high-quality mesh filter, fine dust (fines) can escape into the brew. To fix this, you can place a standard paper Aeropress filter at the bottom of your mesh basket or simply pour the finished concentrate through a paper filter as you serve it. This extra step removes the microscopic particles that cause that "heavy" tongue feel, resulting in a cup that is crisp and bright.
Another pro-tip involves the "bloom." While usually reserved for hot coffee, "blooming" your cold brew with a small amount of hot water can unlock deeper aromatic compounds. Before filling your vessel with cold water, pour just enough hot water (from your campfire kettle) to wet the grounds. Let them bubble for 30 seconds, then immediately fill the rest of the container with cold water. This "hot-start, cold-finish" method bridges the gap between the aromatic complexity of hot coffee and the low-acid smoothness of cold brew.
Finally, consider your storage. Once the grounds are removed, cold brew concentrate starts to oxidize. If you're on a multi-day trip, try to keep the air headspace in your bottle to a minimum. If you have a half-full bottle of coffee, transfer it to a smaller container. This prevents the coffee from taking on a "stale" or papery taste. And remember, coffee grounds are highly acidic; if you're in a fragile ecosystem, pack them out in a zip-top bag rather than burying them, as they can disrupt the local soil pH.
Frequently Asked Questions
How long can I keep cold brew in my cooler while camping? If kept at a consistent "fridge-like" temperature in a cooler with ice, cold brew concentrate will stay fresh for about 7 to 10 days. However, in a typical camping scenario where the ice is melting and temperatures fluctuate, you should aim to consume it within 3 to 4 days. The first sign of spoilage is a sour, vinegary smell or a noticeable loss in the "chocolatey" aroma. Always smell your brew before drinking if it’s been sitting for more than 48 hours without fresh ice.
The key to longevity is keeping the container sealed tight. Every time you open the bottle, you introduce new oxygen and potential contaminants from the camp environment. If you're planning a week-long trip, consider brewing in two smaller batches rather than one large one. This way, the second batch stays sealed and fresh while you work through the first one.
Can I use pre-ground coffee for camping cold brew? Yes, you certainly can, but with a major caveat: most pre-ground coffee is "drip" grind, which is too fine for traditional cold brewing. If you use standard pre-ground coffee, you must reduce your steeping time to about 8 to 10 hours to avoid over-extraction and bitterness. You should also be prepared for more sediment in your cup, as the fine particles will easily pass through most camping filters.
For the best results with pre-ground coffee, look for brands specifically labeled "Cold Brew Grind" or "Coarse Grind." If you only have access to standard drip grind, try using a paper filter or a very fine cloth (like a clean linen bag) to contain the grounds. This will help mitigate the silt and give you a cleaner finish despite the suboptimal grind size.
Is it safe to brew coffee in a creek? Brewing in a creek is a great way to maintain a cool temperature, provided you take a few precautions. First, ensure your vessel is 100% waterproof and that the lid is screwed on tight; you don't want creek water leaking into your coffee, nor do you want coffee leaking out into the ecosystem. Second, secure the bottle. Many campers have lost their morning coffee to a sudden rise in water level or a curious raccoon. Use a piece of paracord to tie the handle of your bottle to a sturdy rock or tree root.
From a safety perspective, the outside of the bottle will be covered in "wild" water which may contain pathogens like Giardia. When you pull the bottle out of the creek, dry the lid area thoroughly with a clean towel before opening it. This prevents creek water from dripping into your clean coffee as you pour.
What is the best way to clean my gear while off-grid? Cleaning coffee grounds in the backcountry requires a "Leave No Trace" mindset. Never rinse your filter or bottle directly in a lake or stream, as coffee oils and grounds can harm aquatic life. Instead, use a spoon to scrape as many grounds as possible into a trash bag. Then, use a small amount of filtered water and a biodegradable soap (like Dr. Bronner’s) to rinse the vessel at least 200 feet away from any water source.
For the mesh filter, a small travel toothbrush is an excellent tool for scrubbing out stuck grounds without using excessive water. Once cleaned, let your gear air-dry in the sun; UV rays have natural antimicrobial properties that help keep your equipment smelling fresh for the duration of your trip.
Can I make cold brew with decaf beans? Absolutely. The cold brew process works exactly the same way with decaf beans. In fact, many people find that decaf cold brew is even smoother than its caffeinated counterpart because the chemical process used to decaffeinate the beans often removes some of the harsher acids beforehand. It’s a great option for "sunset coffee" around the campfire when you want the flavor of coffee without the jitters that would keep you awake in your sleeping bag.
Just keep in mind that decaf beans can sometimes be more brittle, leading to more "fines" during the grinding process. If you notice your decaf cold brew is particularly muddy, try increasing the coarseness of your grind even further or adding a second layer of filtration.
Our Top Picks for 2026
We've spent hours researching and testing to find the absolute best options currently available.

Primula Brew Buddy Portable Pour Over, Reusable Fine Mesh Filter, Dishwasher Safe, Single Serve Coffee or Tea at Any Strength, Ideal for Travel or Camping, Red, 2-Pack Double Pack of 2
- Note: 1)Too coarse a grind, too little coffee, or insufficiently tamping the grounds before brewing can all lead to inadequate pressure for a proper brew. 2)It is important to note that the amount of espresso extracted will vary depending on the grind size and amount and reprogramming may be needed when the size and amount are adjusted
- COFFEE ON THE GO - Anytime, anywhere. Easy and convenient personal brewing system designed for the active coffee lover. The portable, slim line design allows you to brew anywhere you go in as little as 30 seconds. Perfect for everyday use at home, the office, traveling or camping.
- INNOVATIVE DESIGN - Patented brewing technology for a smooth and rich coffee experience. This reusable extra-fine mesh filter ensures no grounds end up in your cup. Fits most coffee cups or mugs including your travel mug.
VA1KENE Cold Brew Coffee Filter for 64oz Wide Mouth Mason Jar Pitcher - Fine Mesh, Reusable 304 Stainless Steel Strainer with Sealing Ring, Cold Brew Strainer for Cold Brew Coffee Maker, Tea Infuser 8.3 inch
- Brew Any Amount: The filter fits 64 oz (3.4 in/87 mm) wide mouth mason jar pitcher, so you can brew just the amount of cold brew you need without having to brew in bulk
- Reusable Design: High quality filter is durable enough for countless brews and easy to clean in the dishwasher between brews
- No Mess Brewing: The flat bottom holds the brew pitcher in place during the steeping process for easy, clean brewing with no grounds leaking through the filter
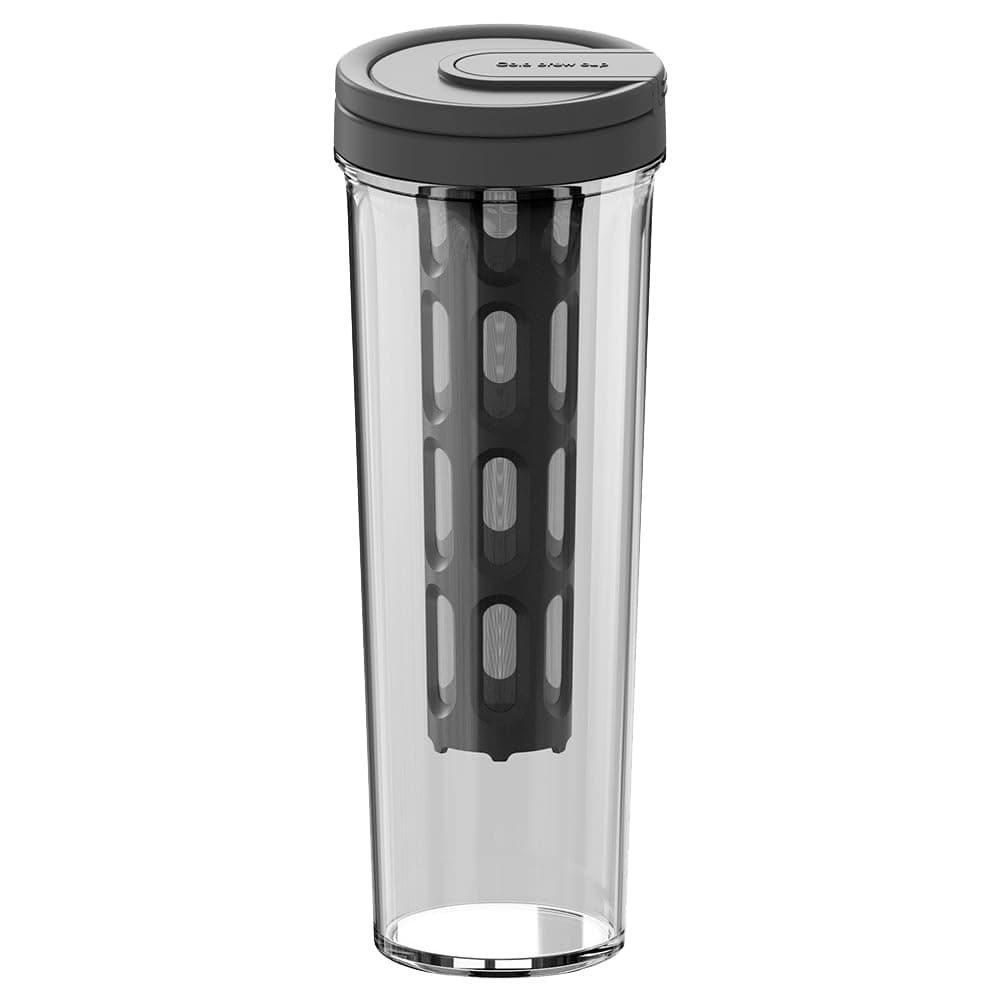
watchget Portable Cold Brew Coffee Maker 34oz/1L Iced Coffee Maker and Tea Brewer Leak-Proof Removable Fine Mesh Filter Perfect for Outdoor Camping Trip (Dark Grey)
- ☕ 【BPA FREE MATERIAL】The bottle is made of food grade PP material with an airtight lid and large ring handle, extremely durable and light weight. Plastic withstands hot temperatures from -30℃ to 70℃(-22℉ to 158℉). Do not worry about breaking during outdoor use. Do not dishwasher safe.
- ☕ 【LARGE CAPACITY PORTABLE TUMBLER】Easy to get a smooth cold brew concentrate with more caffeine and 60% less acidic than traditional hot coffee. The portable cold brew coffee maker has a flavor-locking lid to seal flavor and keep your drink fresh, great to brew & drink a delicious cold brew drink any time on the go! Max capacity is around 1L/34oz. Fits in most refrigerator doors.
- ☕ 【EASY TO USE】Easily make smooth cold brew with any type of coffee grounds or loose-leaf tea. Simply add coffee grounds to the filter(recommended ratio of powder to water is 1:15, adjust according to your preference), pour water, brew in the refrigerator overnight and enjoy.