
How to Grind Coffee Without a Machine
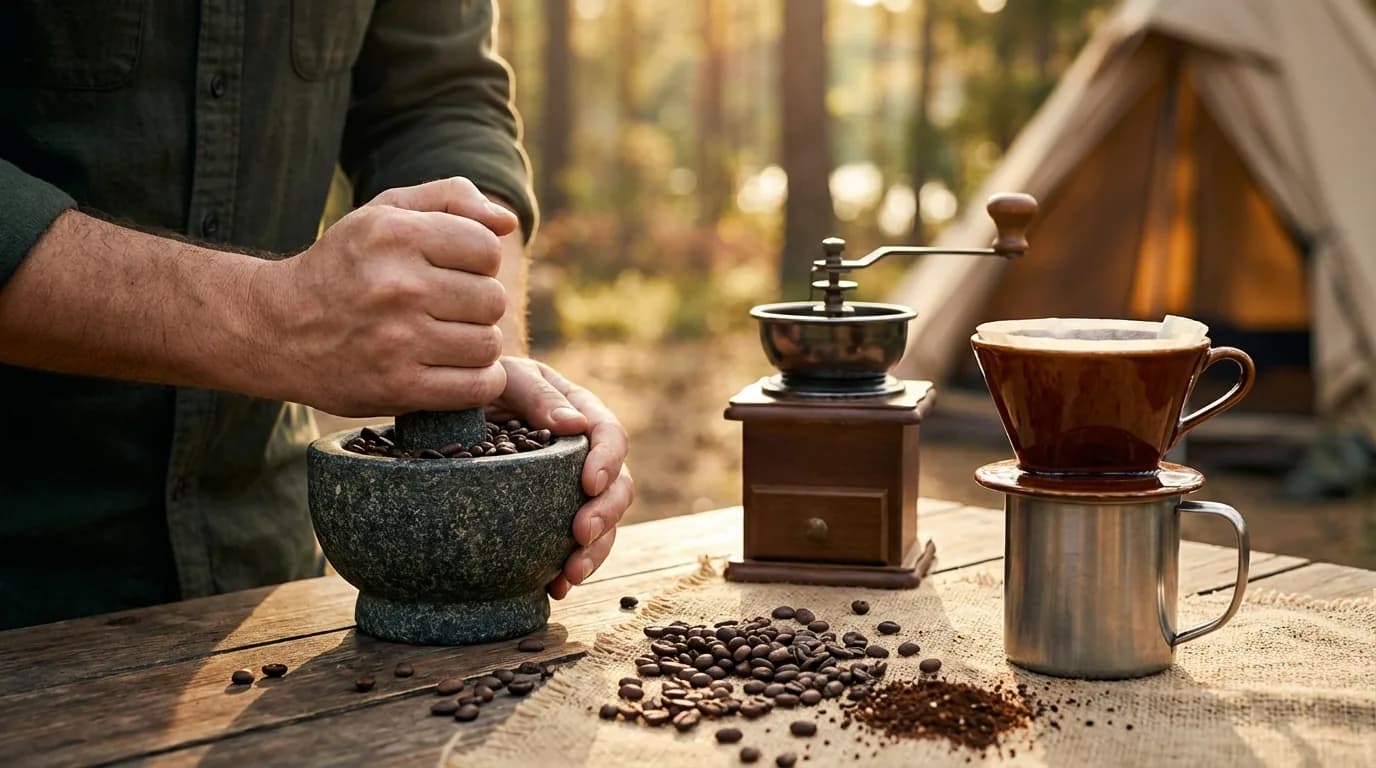
Table of Contents
- The Art of Improvisation: Why You Need This Skill
- The Rolling Pin Method: The Most Reliable DIY Grind
- The Mortar and Pestle: The Traditionalist’s Choice
- The Hammer and Mallet: Brute Force for Coarse Brews
- The Knife Method: Mincing Your Way to a Morning Cup
- The "Technical" Cheat: Using a Blender or Food Processor
- NomadBrew Recommendation: The Portable Solution
- Expert Tips for Better Manual Results
- Frequently Asked Questions
The Art of Improvisation: Why You Need This Skill
We’ve all been there: you’ve trekked miles into the wilderness, set up your perfect off-grid camp, and reached for your bag of specialty whole beans, only to realize you left your manual burr grinder sitting on the kitchen counter at home. Or perhaps you’re facing a long-term power outage and your electric grinder is nothing more than a plastic paperweight. In these moments, knowing how to grind coffee without a grinder isn't just a party trick; it is the difference between a caffeinated, productive morning and a sluggish, headache-filled descent into madness.
Learning these manual techniques forces you to understand the physics of coffee extraction. When you don't have a precision-engineered burr to do the work, you become intimately familiar with bean density, fracture points, and the importance of surface area. It’s a foundational skill for any true nomad or off-grid enthusiast. While you might not achieve the "perfect" espresso-fine consistency required for a 9-bar shot, you can certainly produce a grind suitable for a French press, Aeropress, or cowboy coffee with tools you already have in your pack or kitchen.
In this guide, we will break down the most effective ways to pulverize, crush, and mince your beans using everyday items. We will cover the specific motions required for each method and, more importantly, which brewing styles work best with the results of your hard labor. By the end of this article, you’ll never fear a "grinder-less" morning again, whether you're in a remote cabin or a poorly equipped Airbnb.
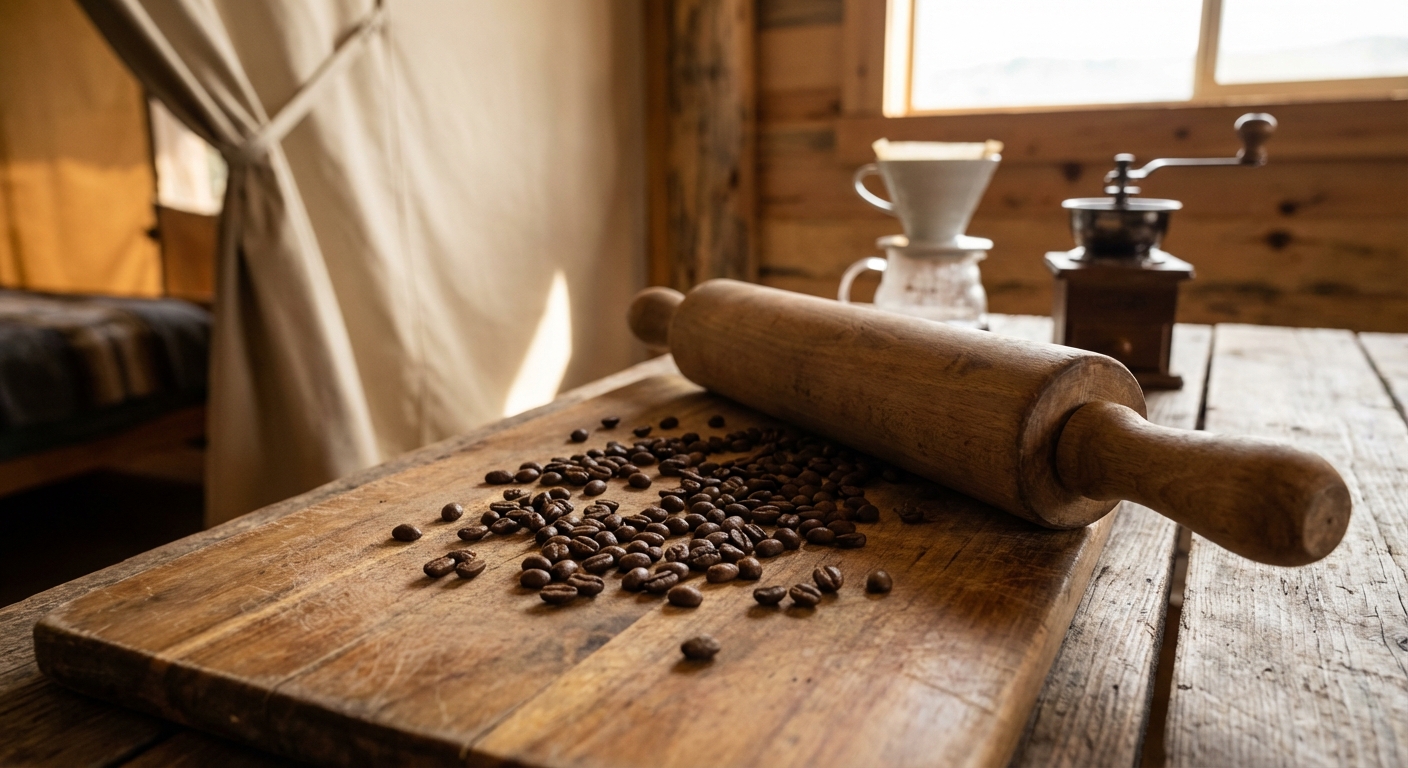
The Rolling Pin Method: The Most Reliable DIY Grind
The rolling pin method is arguably the most effective way to achieve a somewhat uniform grind without a machine. The physics here are simple: you are using even, downward pressure to crush the beans while simultaneously using a rolling motion to break them into smaller fragments. This method is particularly effective because it allows for a decent amount of control over the final "grind size." By adjusting how hard you press and how many times you roll over the beans, you can transition from a coarse French press texture to something approaching a medium drip grind.
To start, you’ll need a sturdy plastic bag—ideally a heavy-duty freezer bag. Place your measured beans inside and press out as much air as possible before sealing. This is crucial; if there is air in the bag, the pressure from the rolling pin will cause the bag to pop, sending coffee shards flying across your campsite. Lay the bag flat on a hard, stable surface like a cutting board or a smooth rock. Avoid using a flimsy table that might bounce, as this absorbs the energy you want to go into the beans.
Begin by gently tapping the beans with the rolling pin to crack the outer shells. Once the beans are broken into smaller chunks, transition to a rolling motion. Use your body weight to lean into the pin, moving it back and forth over the bag. For a French press, you only need about 2 to 3 minutes of consistent rolling. If you’re aiming for a pour-over, you’ll likely need to roll for 5 to 7 minutes, occasionally shaking the bag to ensure the larger chunks move to the top where the pin can reach them.
Why It Works for Nomads
The rolling pin is a staple in most kitchens, but for the traveler, it can be substituted with any heavy, cylindrical object. A sturdy wine bottle, a thermos, or even a smooth piece of driftwood can serve the same purpose. The key is the surface area of the cylinder, which distributes the pressure more evenly than a hammer or a knife, leading to a more consistent extraction and a less bitter cup of coffee.
Best Brew Methods for This Method
Because the rolling pin produces a mix of medium and coarse particles, it is best suited for immersion brewing. Methods like the French press or "Cowboy Coffee" are forgiving of slightly uneven grinds. If you are using an Aeropress, try to roll the beans as fine as possible and increase your steep time by 30 seconds to compensate for the larger "boulders" in your DIY grind.
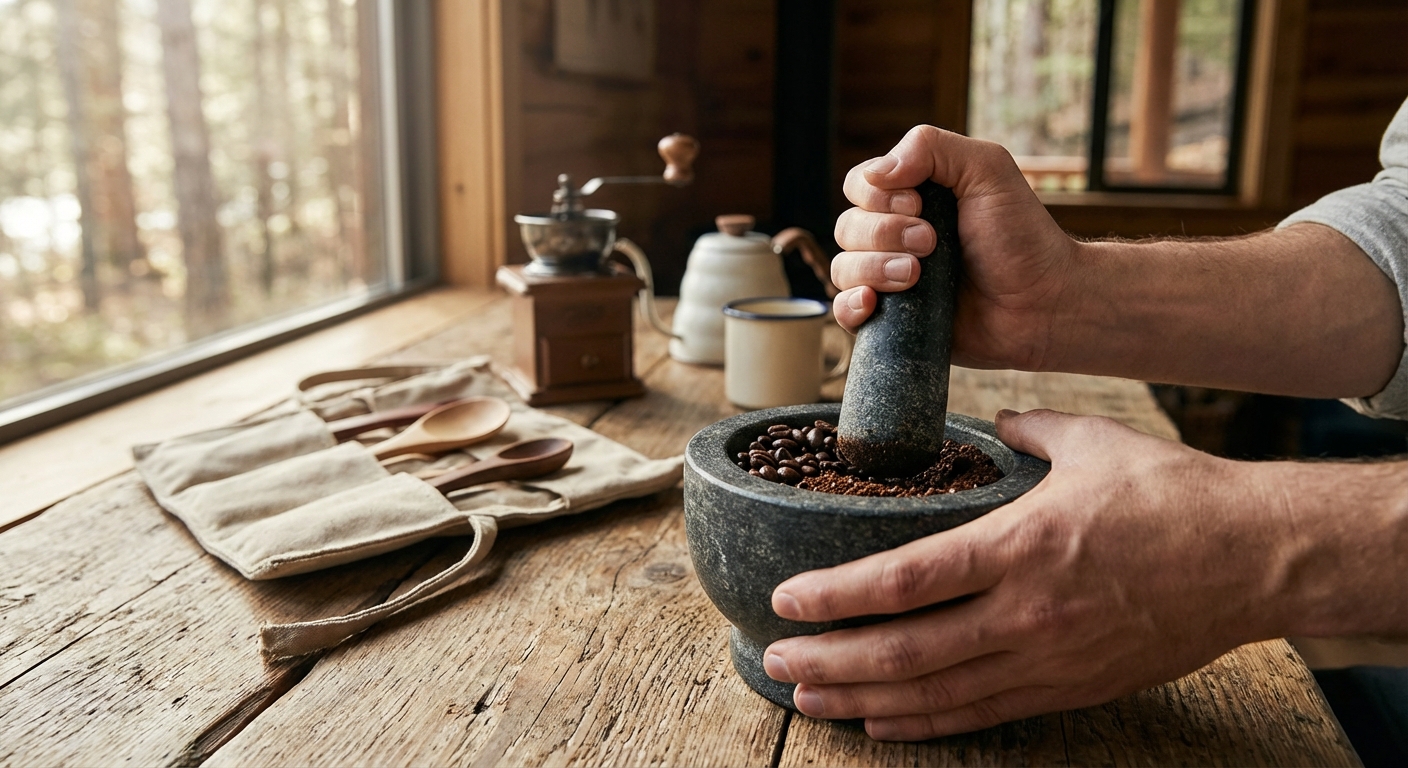
The Mortar and Pestle: The Traditionalist’s Choice
Long before the invention of the electric burr grinder, the mortar and pestle was the gold standard for processing coffee. This tool is designed specifically for crushing and grinding, making it the most "natural" alternative to a dedicated coffee grinder. The benefit of using a mortar and pestle is the tactile feedback; you can feel exactly when the beans have reached the desired consistency. It allows for a level of precision that a rolling pin or a hammer simply cannot match, as you can target individual large chunks that haven't been fully processed.
To achieve the best results, do not overfill the mortar. Process your beans in small batches—about two tablespoons at a time. This ensures that every bean makes contact with the bottom of the bowl and the head of the pestle. Use a "crush and twist" motion. First, come down vertically to crack the beans, then use a circular grinding motion to refine the texture. This dual action mimics the shearing force of a burr grinder, though it requires significantly more elbow grease.
The mortar and pestle is capable of producing a very fine grind, potentially even fine enough for a Moka pot or a crude espresso, if you are willing to put in 10 to 15 minutes of manual labor. However, for most off-grid scenarios, a medium-coarse texture is the goal. The main drawback is the weight; a stone mortar and pestle is not something you’d want to carry in a backpack, but for a cabin or a van-life setup, it is an indispensable tool for both cooking and coffee.
The Hammer and Mallet: Brute Force for Coarse Brews
When you are truly in a pinch and don't mind a bit of noise, the hammer method is your best bet. This is purely a "crushing" method; there is no shearing or grinding involved. Because of this, the results are almost always very coarse and somewhat inconsistent. However, when you’re camping and just need a caffeine fix, "coarse and inconsistent" is better than "whole and un-brewable." The hammer method is surprisingly fast, but it requires a careful setup to avoid making a massive mess.
Similar to the rolling pin method, you must use a heavy-duty bag. Wrap that bag in a kitchen towel or a piece of canvas for an extra layer of protection. This prevents the hammer from puncturing the plastic and protects the surface underneath. Use a mallet if you have one, as the wider head provides a more even strike. If you only have a standard claw hammer, use the flat side and strike with moderate force. You aren't trying to drive a nail; you’re trying to shatter a bean.
The secret to success with a hammer is to check your progress every 10 to 15 strikes. Shake the bag to redistribute the beans. You will likely end up with a lot of "fines" (dust-like particles) and a lot of "boulders" (large chunks). This is the least ideal grind for flavor, but it works perfectly for a long-steep cold brew or a traditional percolator. Just be prepared for a bit of sediment in your cup, as the fine dust will likely pass through most standard filters.
The Knife Method: Mincing Your Way to a Morning Cup
If you are a fan of cooking, you likely have a high-quality chef’s knife nearby. Using a knife to "grind" coffee is essentially the same process as mincing garlic or herbs. This method provides the most "medium" grind of all the manual options, but it is also the most dangerous and time-consuming. It requires a large, sharp blade and a stable cutting board. This is not a method to try on a shaky camping table or after you’ve already had three beers by the campfire.
Place a small handful of beans on your cutting board. Using a rocking motion—keeping the tip of the knife on the board and moving the handle up and down—begin to chop the beans. As the beans shatter, they will try to escape from under the blade. Use your free hand to occasionally scrape the pieces back into a pile in the center. The goal is to keep the beans under the widest part of the blade to maximize the crushing and cutting action.
The knife method is surprisingly effective for pour-over coffee because it creates flat, sheared surfaces on the bean fragments, which allows for decent water penetration. However, it takes a long time to process enough coffee for a full pot. Expect to spend at least 10 minutes mincing to get enough for two cups. It is a labor of love, but it demonstrates a level of dedication to the craft that few other methods can match.
The "Technical" Cheat: Using a Blender or Food Processor
If you have access to power but simply don't have a grinder, a blender or food processor is the ultimate "cheat code." While these are technically machines, they are not coffee grinders, and they function very differently. A coffee grinder uses burrs to crush beans to a specific size, while a blender uses high-speed blades to slice through everything in its path. This can lead to a very uneven grind if you aren't careful, with some parts of the bean turned to dust while others remain nearly whole.
To get the best results from a blender, use the "pulse" setting. Do not simply turn it on and let it run. If the blades spin too long, they generate heat, which can prematurely "cook" the coffee oils and leave your brew tasting burnt or bitter. Pulse for one second, stop, shake the blender to let the beans settle, and pulse again. Repeat this 8 to 12 times until you see a consistency that looks like sea salt.
A food processor is actually slightly better than a blender for this task because the bowl is wider, allowing the beans more room to move around and hit the blades evenly. However, both methods will produce a lot of static electricity, causing the coffee grounds to stick to the sides of the container. Let the container sit for a minute after grinding to let the static dissipate before you try to pour the grounds into your brewer.
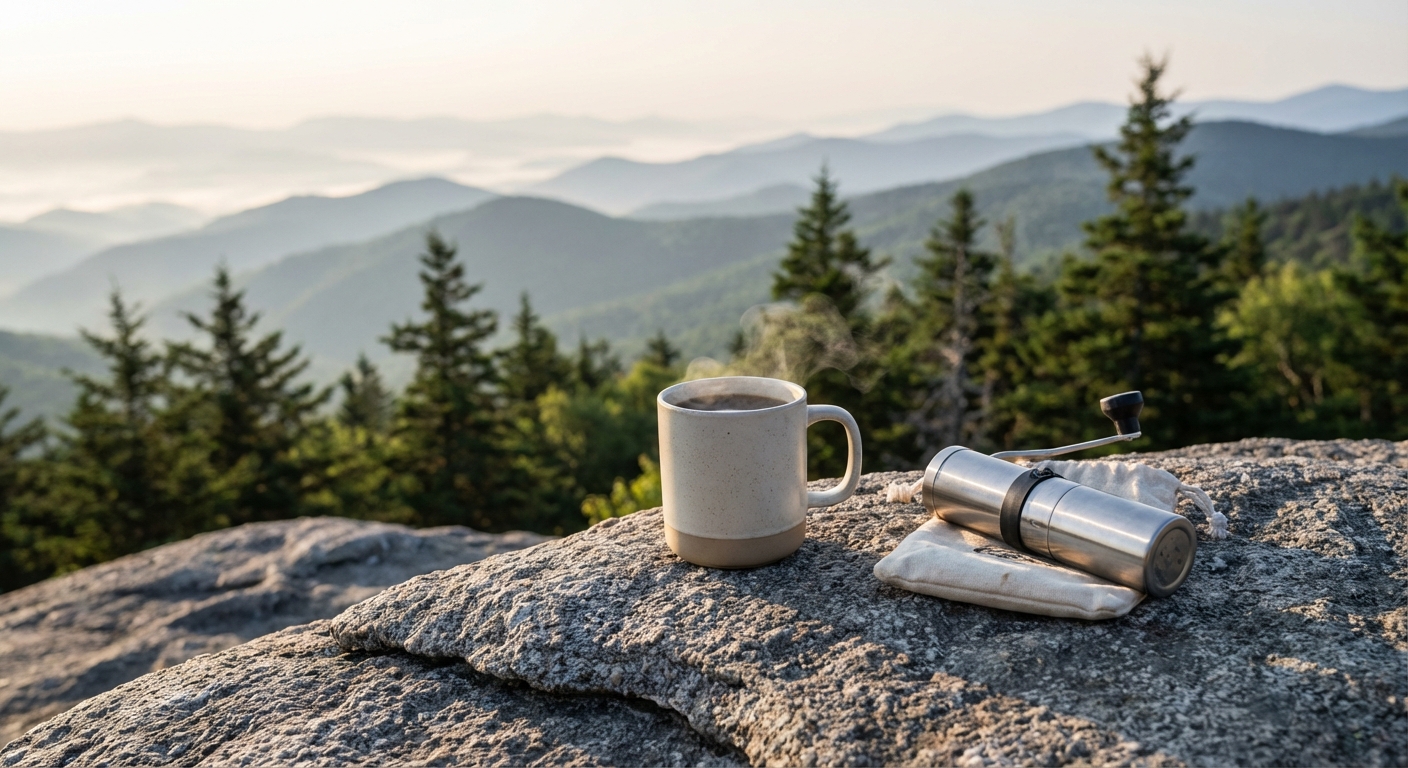
NomadBrew Recommendation: The Portable Solution
While DIY methods are great for emergencies, any serious off-grid coffee enthusiast should eventually invest in a dedicated manual burr grinder. It saves time, saves your wrists, and—most importantly—drastically improves the flavor of your coffee by providing a consistent particle size.
{{PRODUCT_CARD:B0B5G96L9V}}
I highly recommend the Timemore Chestnut C3 for any traveler or nomad. Unlike the DIY methods mentioned above, this manual grinder uses high-precision steel burrs that can produce everything from a coarse French press grind to a fine espresso. It is incredibly lightweight and slim, making it easy to slide into a backpack side pocket or a small kitchen drawer in a van.
This product is best for the solo traveler or the couple who values quality over convenience. The standout feature is the "Spike-to-Grind" (S2G) burr set, which cuts the beans before grinding them, resulting in a much more uniform result than cheaper ceramic grinders. The only real drawback is the capacity; it only holds about 25g of beans, which is perfect for one large cup or two small ones. If you're brewing for a large group, you'll be cranking for a while. Compared to the "hammer" or "rolling pin" methods, the C3 is a massive upgrade that will turn your off-grid coffee from "drinkable" to "exceptional."
{{/PRODUCT_CARD}}
Expert Tips for Better Manual Results
When you are forced to use these improvised methods, the most common issue you will face is an uneven grind. This leads to "uneven extraction," where the small particles over-extract (becoming bitter) and the large particles under-extract (becoming sour). To mitigate this, consider using a slightly lower water temperature. If your grind is inconsistent, using water that is just off the boil (around 195°F or 90°C) rather than boiling water can help prevent the smaller particles from turning bitter too quickly.
Another pro tip is to "sift" your results if you have the equipment. If you’ve used the hammer or rolling pin method, you can use a fine-mesh kitchen strainer to separate the dust from the larger chunks. You can then brew the larger chunks in a French press and save the "fines" for a separate, shorter-steep cup. This extra step takes a bit more time but results in a much cleaner flavor profile that mimics what you’d get from a professional-grade grinder.
Finally, always remember that the freshness of the bean matters even more when the grind is imperfect. If you are using old, stale beans and then crushing them with a hammer, the resulting coffee will be lackluster at best. Use high-quality, freshly roasted beans. The volatile oils trapped inside a fresh bean are more resilient and will still provide a decent aroma and body even if the extraction isn't technically perfect.
Frequently Asked Questions
Can I use a mortar and pestle for espresso? Technically, yes, but it requires an extreme amount of physical effort and time. To get coffee fine enough for a true espresso machine, you would need to grind the beans into a powder-like consistency, which could take 15 to 20 minutes of continuous, vigorous grinding for a single shot. Even then, the lack of total uniformity might cause the espresso machine to "channel," where water finds the easiest path through the puck, resulting in a thin, sour shot. For off-grid espresso, you are better off using a Moka pot, which is more forgiving of a slightly coarser grind.
Is it better to grind too coarse or too fine when using DIY methods? When in doubt, aim for too coarse. Most off-grid brewing methods like the French press, Aeropress, or Cowboy Coffee can handle coarse grounds by simply increasing the steeping time. If you grind too fine using a hammer or rolling pin, you will likely end up with a "muddy" cup full of sediment that is difficult to filter and tastes overly bitter. A coarse grind is easier to manage and results in a much cleaner, more palatable cup of coffee when you don't have a professional filter setup.
Will using a blender ruin the flavor of my coffee? It won't "ruin" it, but it certainly won't help. The main risks with a blender are heat and inconsistency. The high speed of the blades creates friction, which can heat up the coffee grounds and dissipate the delicate aromatic oils that give specialty coffee its unique flavor. To avoid this, always use short pulses and let the blades come to a complete stop between pulses. If you follow the "pulse and shake" method, you can get a decent result that is perfectly acceptable for a morning brew.
What is the best "emergency" tool if I have nothing on this list? If you are truly stuck with no tools, you can use two flat, heavy rocks. This is the ultimate "primitive" coffee grind. Wash the rocks thoroughly, place your beans on one, and use the other to crush and rub them together. It’s messy and you’ll likely get a bit of grit in your coffee, but it has been done by travelers for centuries. Just make sure the rocks aren't made of a crumbly material like sandstone, or you'll be drinking more rock than coffee.
How do I clean my tools after grinding coffee? Coffee contains natural oils that can go rancid over time. If you use a rolling pin, mortar and pestle, or blender to grind coffee, it is vital to wash them with warm, soapy water immediately after use. This is especially important for the mortar and pestle, as the porous stone can absorb coffee oils and flavor your next batch of guacamole or spices with a stale coffee taste. A quick scrub with a stiff brush is usually enough to keep your equipment in top shape.
Our Top Picks for 2026
We've spent hours researching and testing to find the absolute best options currently available.

Manual Coffee Grinder for Home Use, Ceramic Burr Hand Crank Automatic Coarseness Stainless Steel Espresso Bean Mill for Travel Camping with Portable Storage Pouch, Easy to Clean Brush Spoon Small Black
- [ Coffee Grinder Accessories ] This coffee grinder includes a hand-crank coffee grinder, a spoon for holding coffee beans and a brush for cleaning, a convenient carrying bag and a simple instruction manual. The size of a mobile phone, the accessories are suitable for use in a variety of scenarios.
- [ Material ] The coffee grinder body is made of 304 stainless steel with a thickness of 0.8mm. ceramic burrs can maintain the original flavor of coffee because its blades are harder and can grind continuously easily without getting hot. Rounded solid wood handle, comfortable to use.
- [ Precision Grinding ] EsteaCovo manual coffee grinders have a mechanism to adjust the grind size. Determine the grind size you need based on your brewing method. For example, for espresso, you'll need a fine grind, while for French press, you'll need a coarser grind. Adjust the grind size by turning the adjustment knob located either at the bottom of the grinder.

Brewing and Grinding Coffee: How to Make Good Coffee at Home (I Know Coffee Book 4)
- Top-tier performance in real-world testing
- Premium materials and exceptional build quality

How To Make The Best Coffee At Home
- Top-tier performance in real-world testing
- Premium materials and exceptional build quality