
How to Dial In Grind Size by Eye
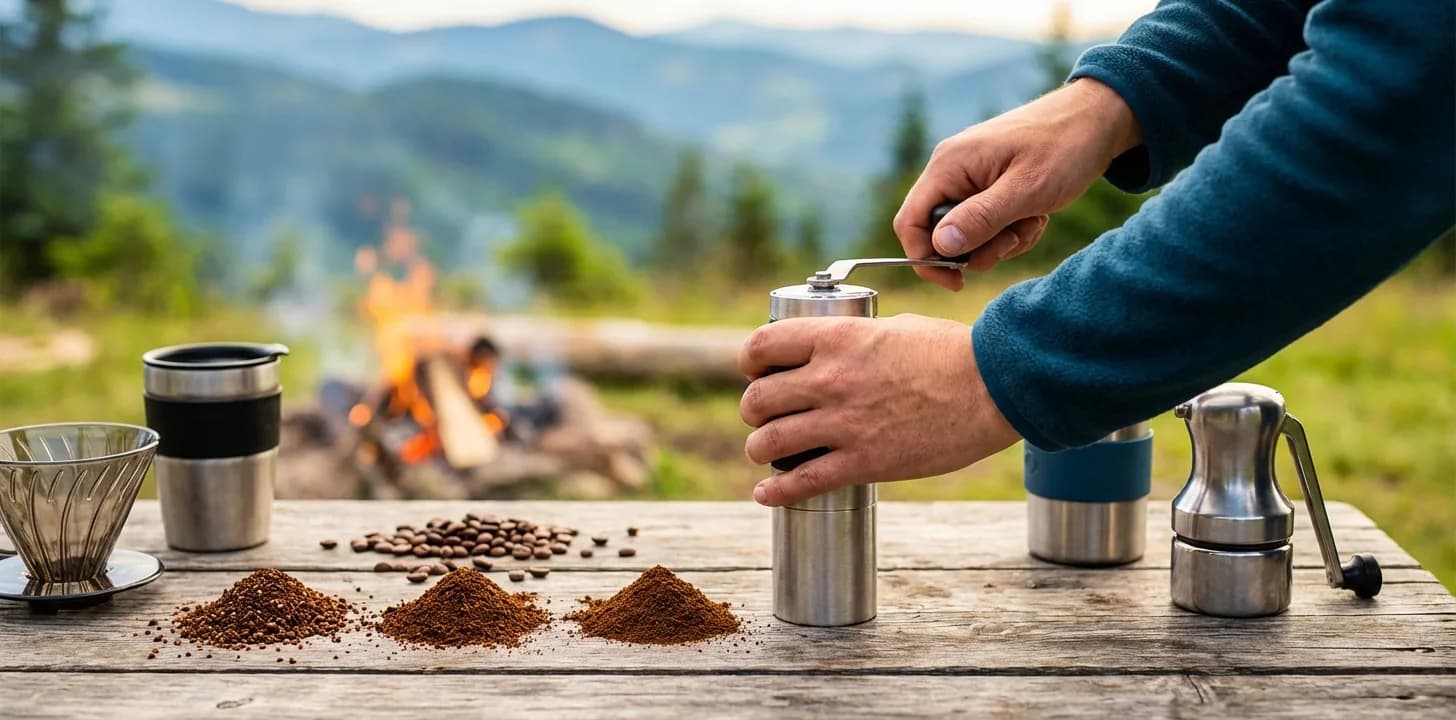
Table of Contents
- The Importance of Visual Dialing for the Off-Grid Brewer
- The Visual Coffee Grind Size Guide: A Spectrum
- The Benchmark Method: Using Everyday Textures
- Beyond Sight: The Tactile "Pinch Test"
- Adjusting on the Fly: Visual Cues During the Brew
- Common Mistakes When Dialing In by Eye
- Frequently Asked Questions
The Importance of Visual Dialing for the Off-Grid Brewer
When you are brewing coffee in a remote cabin, a van, or deep in the backcountry, you rarely have the luxury of a digital scale with 0.1g accuracy or a manufacturer’s grind chart pinned to your wall. In these environments, your senses become your most valuable tools. Visual dialing is the art of recognizing the specific particle size required for your brewing method simply by looking at the grounds. This skill is essential for nomads because different beans—depending on their roast level and density—will behave differently in your manual grinder. A "15-click" setting on a hand grinder might produce a medium-fine grind for a dense Ethiopian light roast but look significantly coarser for a dark roasted Sumatran bean.
Mastering a visual coffee grind size guide allows you to adapt to any situation. If you switch from a French Press in the morning to an AeroPress in the afternoon, being able to visually verify the texture ensures you aren't wasting precious beans on a sour or bitter cup. It also helps you troubleshoot equipment issues. If your grinder’s burrs are beginning to drift or if there is a "fines" buildup, your eyes will catch the inconsistency long before your taste buds have to suffer through a muddy brew. Developing this "eye" for grind size bridges the gap between technical precision and the practical reality of off-grid living.
Furthermore, visual dialing fosters a deeper connection with the ritual of coffee making. Instead of blindly following a number on a dial, you are engaging with the physical material. You begin to notice how the light hits the jagged edges of a coarse grind versus the soft, pillowy mounds of an espresso-fine grind. This sensory feedback loop is what separates a casual coffee drinker from a true nomad brewer. By the end of this guide, you will have a mental library of textures and benchmarks that will allow you to brew a perfect cup anywhere in the world, regardless of whether you have a manual or a data sheet.
The Visual Coffee Grind Size Guide: A Spectrum
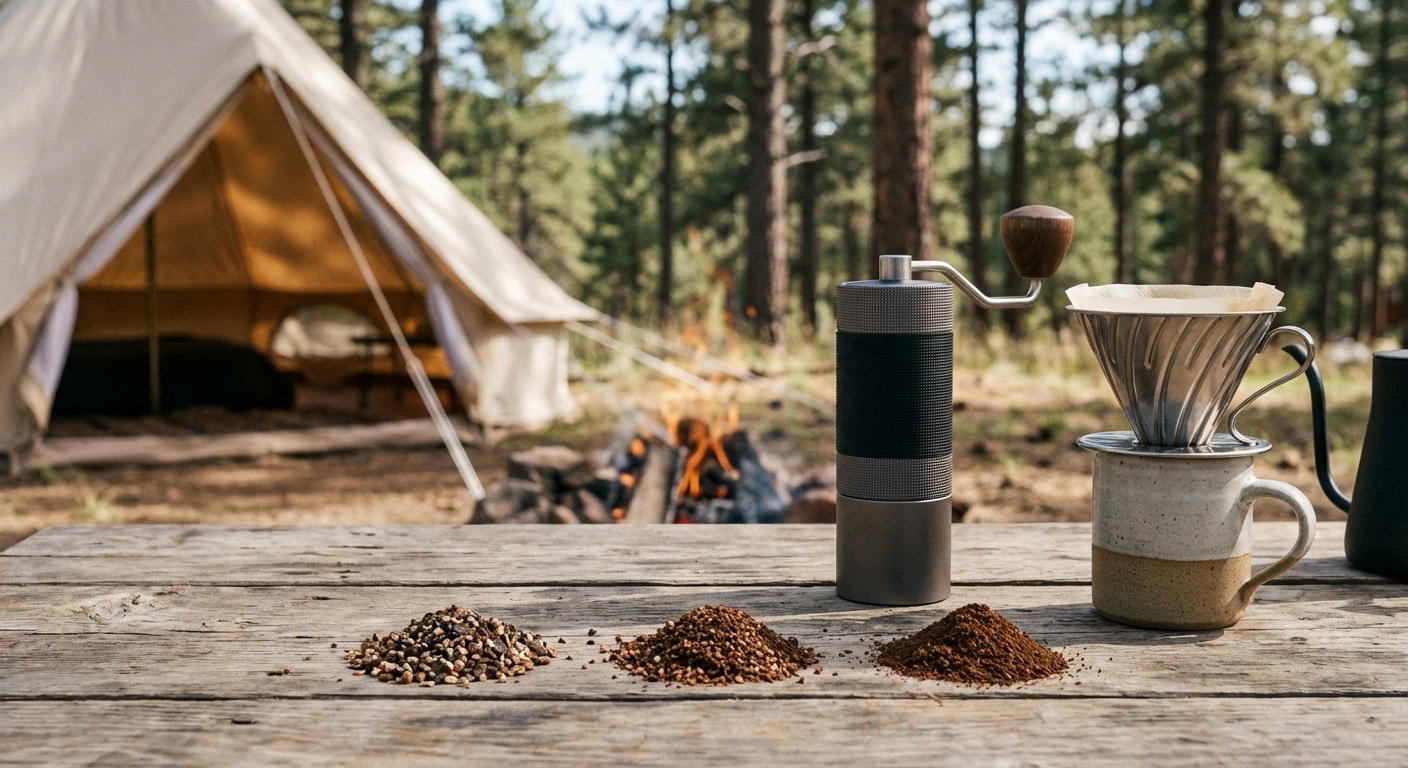
Understanding the spectrum of coffee grinds is like learning a new language. At one end, you have large, chunky particles that resemble rocky terrain, and at the other, you have a fine, powdery dust. Each "vocabulary word" in this spectrum corresponds to a specific contact time with water. The larger the particle, the more time it needs to release its flavors; the smaller the particle, the faster the extraction happens. When you are dialing in by eye, you are essentially looking for the surface area that matches your intended brewing time.
For the nomadic brewer, this spectrum is usually divided into three major categories: Coarse, Medium, and Fine. However, the nuances lie in the "in-between" stages. A visual guide isn't just about identifying a single size; it’s about recognizing the transition points. For instance, moving from a medium grind to a medium-fine grind can be the difference between a bright, sweet pour-over and one that tastes unpleasantly hollow. By training your eyes to see these subtle shifts in texture, you gain total control over the extraction process, even when using basic manual gear.
Extra Coarse to Coarse (The Sea Salt Range)
Extra coarse coffee is the most rugged of the bunch. Visually, these grounds should look like cracked peppercorns or very chunky sea salt. You should be able to see the individual "facets" of the coffee bean fragments clearly. This size is primarily used for Cold Brew, where the coffee sits in water for 12 to 24 hours. Because the particles are so large, the water takes a long time to penetrate to the center, preventing the brew from becoming overly bitter during the long immersion. If your extra-coarse grind looks more like gravel, it’s likely too large and will result in a weak, watery concentrate.
Standard "Coarse" coffee is the go-to for the classic French Press. It should resemble Kosher salt—distinct grains that are easy to see but smaller than the "peppercorn" stage. When you look at a pile of coarse grounds, they should not clump together at all; they should flow freely like dry sand. In a French Press, this size allows for a 4-minute steep time that extracts the rich oils and body without letting the tiny "fines" pass through the metal mesh filter. If you see too much "dust" in your coarse grind, your manual grinder might be producing inconsistent results, which will lead to a muddy cup.
To achieve this range on a manual grinder, you are usually looking at the furthest reaches of the adjustment nut. For travelers using a French Press or a percolator over a campfire, this visual benchmark is your safety net. If the grounds look like they could be easily picked up individually with a pair of tweezers, you are in the coarse territory. Always aim for uniformity here; the more the particles look like they belong to the same "batch" of salt, the cleaner your final cup will be.
Medium-Coarse to Medium (The Sand and Sugar Range)
The medium range is the "Goldilocks" zone for most manual brewing methods, particularly the Chemex, Clever Dripper, and standard drip brewers. Medium-coarse coffee should look like rough, grainy sand—the kind you might find on a volcanic beach. It’s finer than Kosher salt but still has a distinct "crunchy" appearance. This size is ideal for the Chemex because the thick paper filter requires a slightly faster flow rate to prevent the water from stalling, which would lead to over-extraction and bitterness.
True "Medium" coffee is perhaps the most common grind size and looks remarkably like granulated white sugar or dry, beach sand. This is the baseline for most pour-over drippers like the Hario V60 or the Kalita Wave. When you look at medium grounds, you shouldn't see individual "chunks" anymore, but rather a consistent texture that holds its shape slightly when mounded. If you are brewing in a van with a simple plastic dripper, this is the size you will likely aim for most often. It provides enough resistance to the water to create a 2.5 to 3-minute brew time.
Achieving a perfect medium grind by eye requires looking for the absence of extremes. You don't want the "rocks" of a coarse grind, nor do you want the "clumps" of a fine grind. It should look incredibly uniform. If you find your pour-over is draining too quickly (under 2 minutes), your eyes should tell you that the "sand" looks a bit too much like "salt." Conversely, if the water is sitting on top of the bed for 5 minutes, you’ve likely drifted into the fine territory, and the "sand" has become "silt."
Medium-Fine to Fine (The Table Salt and Flour Range)
Medium-fine is the sweet spot for the AeroPress and Moka Pot. Visually, this grind is significantly finer than granulated sugar, resembling table salt. At this stage, you will notice that the coffee begins to behave differently; it will start to clump together slightly if you press it with a finger. This is because the increased surface area allows for more static and moisture interaction. For a nomad using an AeroPress, this "table salt" texture allows for a quick 1.5 to 2-minute brew that is punchy and concentrated, perfect for a makeshift latte in the woods.
"Fine" coffee is the domain of espresso and the Prismo attachment for the AeroPress. It should look like powdered sugar or very fine flour, but with a slight grittiness if you rub it between your fingers. When you look at a pile of fine grounds, they should appear soft and pillowy. You won't be able to see individual grains without looking very closely. This size creates a high amount of resistance, which is necessary for methods that use pressure to force water through the "puck" of coffee.
For off-grid brewers, getting to a true "fine" grind on a manual grinder can be a workout. Visually, you are looking for a complete lack of visible "shards." If you see any shiny, larger pieces in your fine grind, your grinder is "chipping" the beans rather than grinding them, which will ruin the pressure needed for a Moka Pot or espresso-style brew. The grounds should look like a uniform, dark powder. If you can leave a fingerprint in the pile of coffee, you have successfully reached the fine range.
The Benchmark Method: Using Everyday Textures
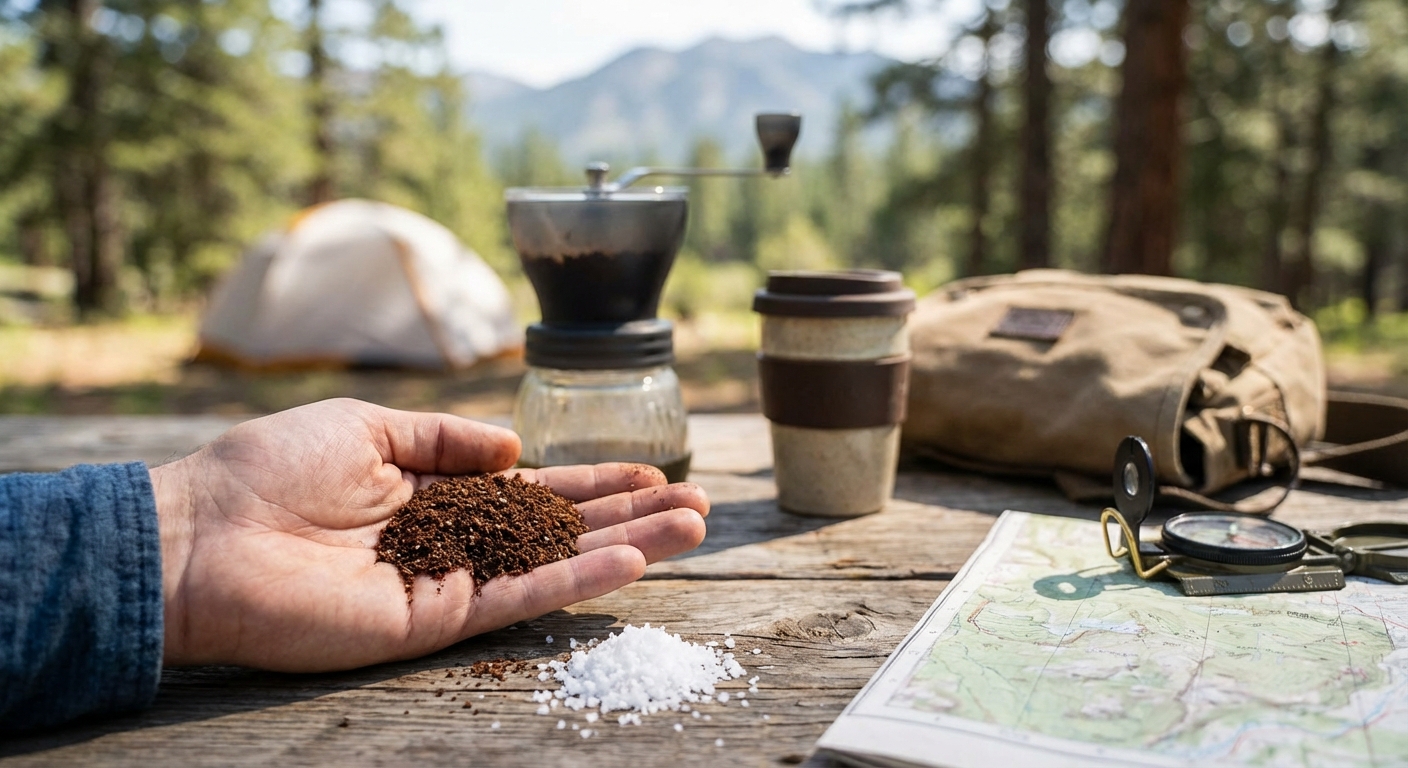
One of the most effective ways to master the visual coffee grind size guide is to use benchmarks. When you are traveling, you might not have a reference chart, but you almost certainly have access to common pantry items or natural elements. By comparing your coffee grounds to these known textures, you create a mental "calibration" that is much more reliable than memory alone. This method is particularly useful when you are switching between different bean types, as the visual density can be deceiving.
Start by keeping a small amount of "reference material" if you are struggling. For example, a small packet of salt or sugar can be held next to your grounds. If your French Press grind looks smaller than the Kosher salt, you need to coarsen it up. If your pour-over grind looks larger than the granulated sugar, it’s time to click your grinder finer. These physical touchstones provide an objective reality that helps you ignore the "optical illusions" caused by different roast colors—darker roasts often look coarser than they actually are because of the way they reflect light.
Beyond the pantry, look at the environment around you. If you are camping near a stream or beach, compare your medium-coarse grind to the sediment or sand. If you are in a dusty environment, compare your espresso fine grind to the fine silt on the ground (though don't mix them!). The goal is to build a library of tactile and visual associations. Over time, you won't need the salt packet anymore; you’ll simply look at the catch cup of your manual grinder and know instantly if you’ve hit the mark.
Beyond Sight: The Tactile "Pinch Test"
While your eyes provide the first layer of data, your sense of touch provides the confirmation. The "Pinch Test" is a professional technique used by baristas that is perfectly suited for the nomadic brewer. To perform this, take a small pinch of your ground coffee between your thumb and forefinger and rub them together. This tells you about the shape and "sharpness" of the particles, which your eyes might miss if the lighting is poor (a common issue in van life or tent camping).
For a coarse grind, the pinch test should feel sharp and distinct, almost like rubbing small pebbles. There should be no "smearing" on your skin. For a medium grind, it should feel gritty, like sand, and leave a very light dusting of oils on your fingers. When you get to the fine range, the coffee should feel soft and almost "creamy." If you press a pinch of fine grounds together, they should hold their shape and form a small clump. If the grounds fall apart immediately like dry sand, you aren't at the "fine" stage yet.
The pinch test also helps identify "fines" or inconsistent grinds. If you feel large, rocky chunks mixed with a soft, powdery dust, your grinder is producing an inconsistent range. This is often a sign that your manual grinder’s burrs are misaligned or that you are grinding too fast, causing the beans to shatter. A consistent grind will feel uniform across your fingertips. Combining the visual guide with this tactile feedback creates a "dual-verification" system that ensures brewing success regardless of your equipment.
Adjusting on the Fly: Visual Cues During the Brew
Dialing in doesn't stop once the grinder is put away. The way the coffee behaves once water hits it provides the final visual confirmation of your grind size. This is especially true for pour-over and immersion methods. For a pour-over, watch the "bloom"—the initial degassing phase. If the water disappears instantly and no bubbles form, your grind might be too coarse. If the water sits on top and refuses to drain, you have likely gone too fine, creating a "mud" that is clogging the filter.
Observe the "bed" of coffee at the end of the brew. In a perfect pour-over, the spent grounds should look like wet, flat sand against the filter. If the bed looks like a thick, slimy paste, your grind was too fine (or you have too many fines). If the bed looks like a pile of wet rocks with large gaps between them, it was too coarse. These post-brew visual cues are your best teachers for the next morning's cup. Take a mental note: "The bed looked muddy today; I'll go two clicks coarser tomorrow."
In a French Press or AeroPress, look at the resistance when you plunge. While this is a tactile cue, it has a visual component. If you are pressing an AeroPress and it takes zero effort, the water is bypassing the grounds because they are too coarse. You will see a pale, thin liquid entering the cup. If it takes all your body weight to move the plunger, the grounds are too fine, and you’ll see a dark, over-extracted syrupy liquid. The visual color and flow rate of the coffee as it exits the brewer are the ultimate indicators of your grind's success.
Common Mistakes When Dialing In by Eye
The most common mistake when using a visual coffee grind size guide is ignoring the "Roast Illusion." Darker roasted beans are more brittle and less dense; when ground, they tend to look more "voluminous" and flaky. This can lead you to believe the grind is coarser than it actually is. Conversely, light roasts are very dense and produce "cleaner" looking cuts that can appear finer to the naked eye. Always adjust your visual expectations based on the roast level: if it's a dark roast, aim for a look that's slightly "larger" than your benchmark; for light roasts, aim for something that looks a bit more "compact."
Another pitfall is poor lighting. Trying to dial in your grind by the light of a campfire or a dim van LED will almost always lead to errors. Shadows can hide the "fines" or make a medium grind look like a coarse one. Whenever possible, check your grind in natural daylight. If you’re brewing before sunrise, use a dedicated headlamp or a bright flashlight to inspect the grounds in the catch cup. Consistency is impossible if you can't actually see the particles you're trying to measure.
Finally, many nomads forget to "purge" their grinder when changing settings. If you move from a coarse French Press setting to a fine AeroPress setting, there will still be coarse fragments trapped in the burrs. If you don't grind a few beans through to clear them out, your "fine" grind will have "rocks" in it, throwing off your visual assessment. Always grind a gram or two of coffee at the new setting before you do your final visual check. This ensures that what you are seeing is a true representation of your current grinder setting.
Frequently Asked Questions
How do I know if my manual grinder is consistent enough for visual dialing? A high-quality manual grinder will produce particles that all look like they belong to the same family. If you look at your grounds and see a mix of "boulders" (large chunks) and "dust" (fine powder), your grinder is inconsistent. This is common in cheap blade grinders or low-end ceramic burr grinders. For visual dialing to work, you need a grinder with steel burrs and a stable axle that keeps the particles uniform. If the "sand" looks like it has "pebbles" in it, your brew will be both bitter and sour at the same time.
To test your grinder, grind a small amount on a medium setting and spread it out on a white piece of paper. If the particles look mostly uniform in size and shape, you’re in good shape. If you see a wide variance, you may need to adjust your technique (grinding slower) or upgrade to a more stable manual grinder. Visual dialing relies on the assumption that the "average" particle size you see is what the entire batch consists of.
Can I use the same visual guide for all types of coffee beans? Generally, yes, but with minor adjustments for roast level. As mentioned earlier, dark roasts are more porous and break apart differently than light roasts. A dark roast ground for pour-over might look slightly more "jagged" or flaky than a light roast at the same setting. However, the basic benchmarks—sea salt, granulated sugar, and table salt—remain the universal standards. The more you practice, the more you will notice how different origins (like a soft Brazilian bean versus a hard Ethiopian bean) look under the lens.
The density of the bean also affects how it "piles" in your grinder. A very dense light roast will look like a smaller volume of coffee compared to a dark roast of the same weight. This is why visual dialing is best used for texture rather than volume. Focus on the size of the individual grains rather than how much space the pile takes up in your catch cup.
What should I do if my grind looks right but the coffee tastes sour? If your coffee tastes sour, it is under-extracted. This means the water didn't pull enough flavor out of the beans. Visually, this usually means your grind is too coarse for the brewing time. Even if it looks like the right "sand" texture, try clicking your grinder one or two steps finer. Sometimes the "visual" sweet spot is narrower than we think. Sourness is a signal to increase the surface area (grind finer) or increase the water temperature.
In an off-grid setting, water temperature is often the culprit. If your water isn't hot enough (common when brewing in cold environments), a grind that looks "correct" will still under-perform. If you are confident in your visual grind size, try using water that is closer to a rolling boil. If it’s still sour, your eyes are telling you "medium," but your taste buds are demanding "medium-fine." Trust your taste buds as the final judge.
How does humidity or altitude affect the visual appearance of my grind? Humidity is a major factor for the nomad. In very humid environments, coffee grounds will clump together more aggressively due to static and moisture. This can make a medium grind look "finer" because it’s not flowing as freely. In dry, high-altitude environments, static can cause grounds to fly everywhere and stick to the sides of your grinder. This might make the grind look "messier," but the actual particle size remains the same.
When dealing with high humidity, use the "pinch test" more than your eyes. If the grounds feel gritty like sand but look clumpy, they are likely still a medium grind. At high altitudes, the lack of air pressure doesn't change the grind size, but it does change the boiling point of water. You might find you need to grind slightly finer than usual to compensate for the lower water temperature at a boil.
Is it possible to "over-grind" and make the coffee too fine by eye? Yes, and this is a common mistake for those moving from French Press to pour-over. If you go too fine, the coffee will look like a solid mass rather than a collection of grains. If you can't see any "daylight" or space between the particles when you spread them out, you've likely hit the "espresso" or "powder" stage. For most nomadic methods like the AeroPress or V60, you still want to see some evidence of grain structure.
If you suspect you've gone too fine, look at the color. Very fine grinds often look a shade lighter than coarse grinds because of the way they reflect light. If your grounds look like a pale, uniform dust, you’ve gone past the "table salt" stage and into the "flour" stage. Unless you are making a Moka Pot or a Turkish coffee over the fire, back off the grinder settings until you see that "sandy" texture return.
Our Top Picks for 2026
We've spent hours researching and testing to find the absolute best options currently available.
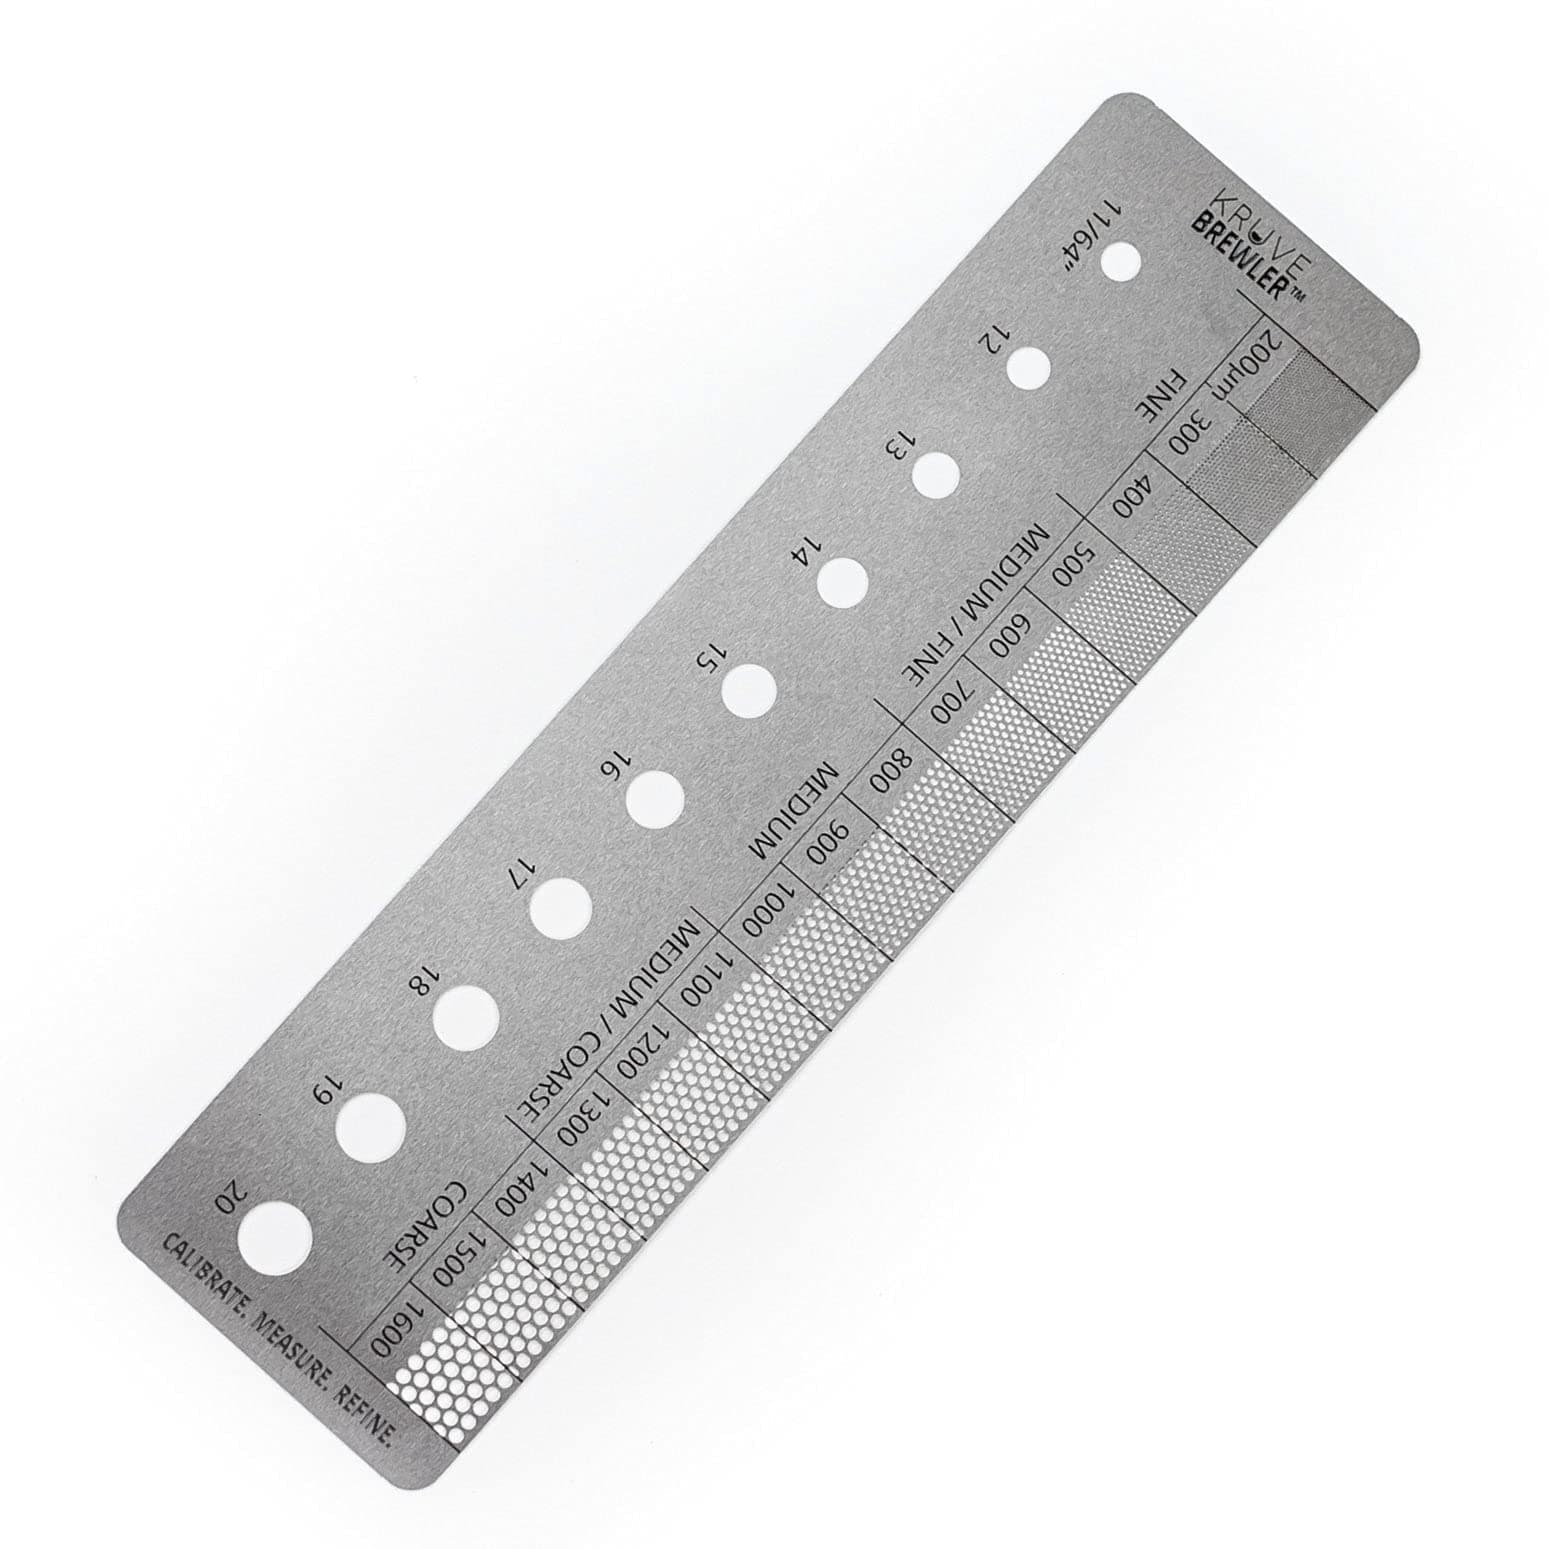
KRUVE Brewler Coffee Grind Ruler - Stainless Steel Coffee Bar Accessories for Home, Coffee Grind Size 200-1600 Microns, Green Bean Grading 11/64-20/64, 5.9 Inch Ruler, Conversion Chart, Magnetic Guide
- Accurate Grind Measurement - Measure grind sizes from 200 to 1,600 microns, ensuring consistency for all brewing methods, from espresso to French press. A must-have kitchen gadget for achieving perfect ground coffee at home or in any coffee setup.
- Makes the Perfect Gift - An ideal gift or stocking stuffer for coffee enthusiasts! Delight your loved ones with this essential coffee bean grinder tool that elevates their coffee brewing experience and helps them achieve the perfect cup every time.
- 15cm Ruler - A solid stainless steel ruler for measuring portafilter baskets, tampers, and other espresso accessories, making it perfect for use in the home office, coffee bar, or any professional coffee setting.
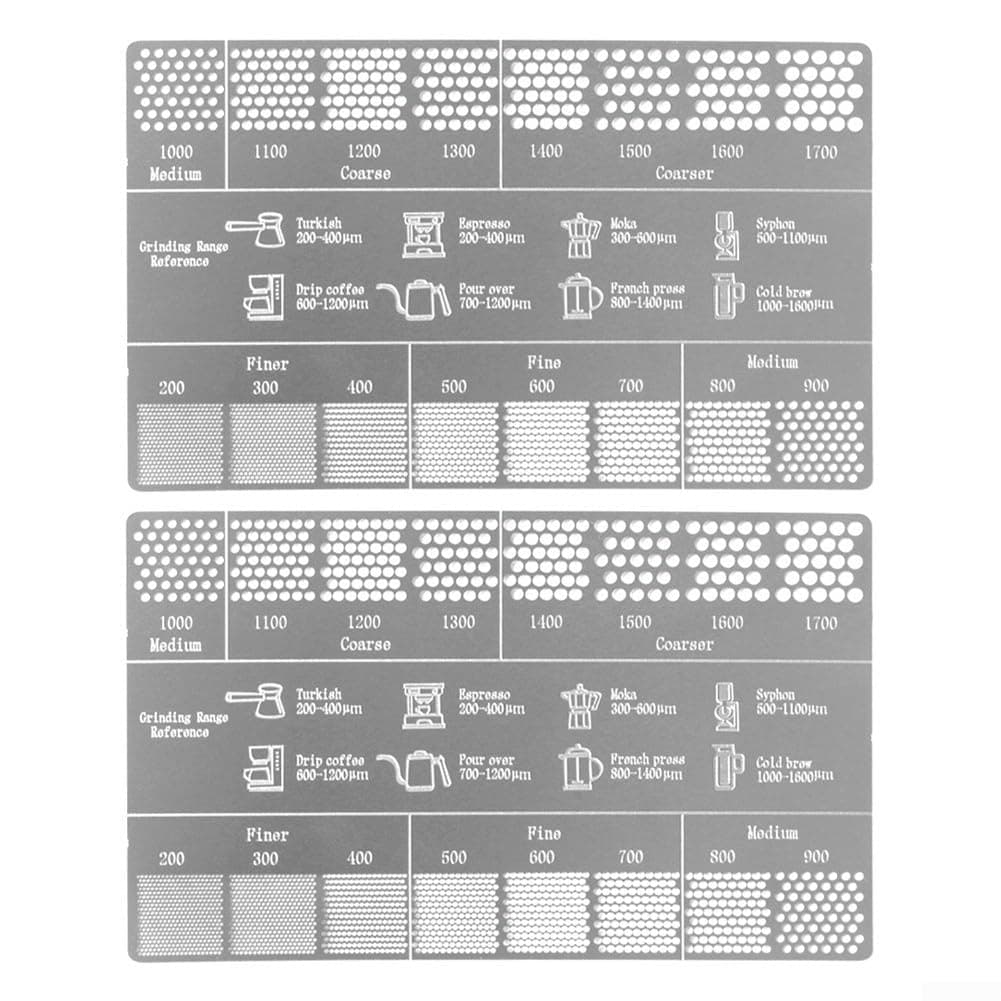
For Coffee Grinding Reference Card Stainless Steel for For Coffee Enthusiasts with Clear Scale Guide for Precise Grind Size Adjustment and Brewing Experience (2 PCS) 2pcs
- [FUNCTIONAL DESIGN FOR ENTHUSIASTS] This grinding reference card is tailored specifically for coffee lovers, helping you achieve the grind size to enhance your brewing experience.
- [STAINLESS STEEL DURABILITY] Crafted from robust stainless steel, this card ensures longevity and withstands daily use in your grinding routine.
- [CLEAR GRINDING REFERENCE] The clear scale and size references guide you through the grinding process, making it easy to find the perfect consistency for your taste preferences.
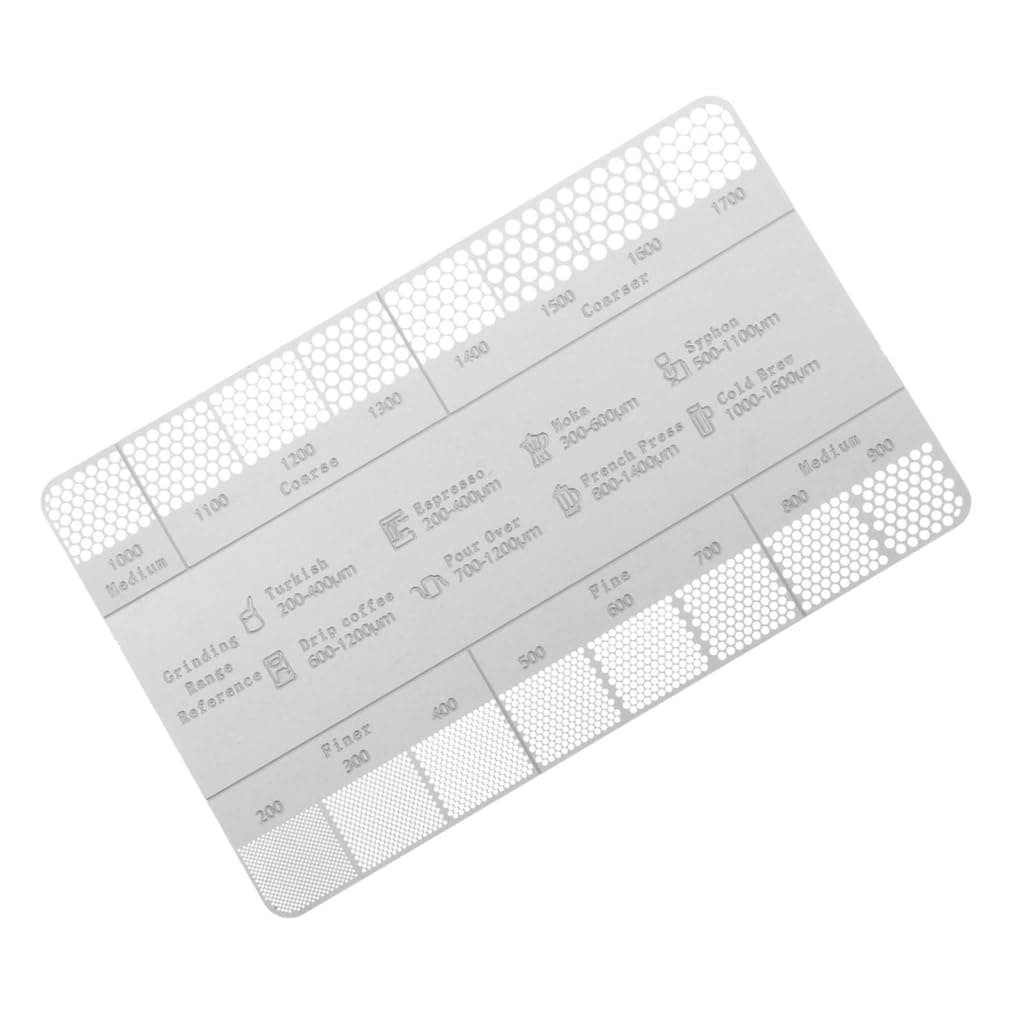
Coffee Grind Reference Card Metal Coffee Measuring Stick Pro Tools Coffee Grind Size Ruler Coffee Bean Grinder Accessory English Style
- Experience the convenience of our stainless steel coffee grind reference card. Say goodbye to guesswork and achieve precise measurements for a more accurate brewing process.
- Designed for coffee enthusiasts, this handy tool provides quick conversion diagrams for common brewing conversions. Its simple and satisfying design makes it easy to calibrate your grinder and achieve consistent grind sizes.
- Suitable for both experienced coffee lovers and home brewers, this versatile grind reference card works with all brands and models of coffee grinders. It's an essential tool for achieving desired grind sizes and optimizing your coffee brewing process.